Add New Employee
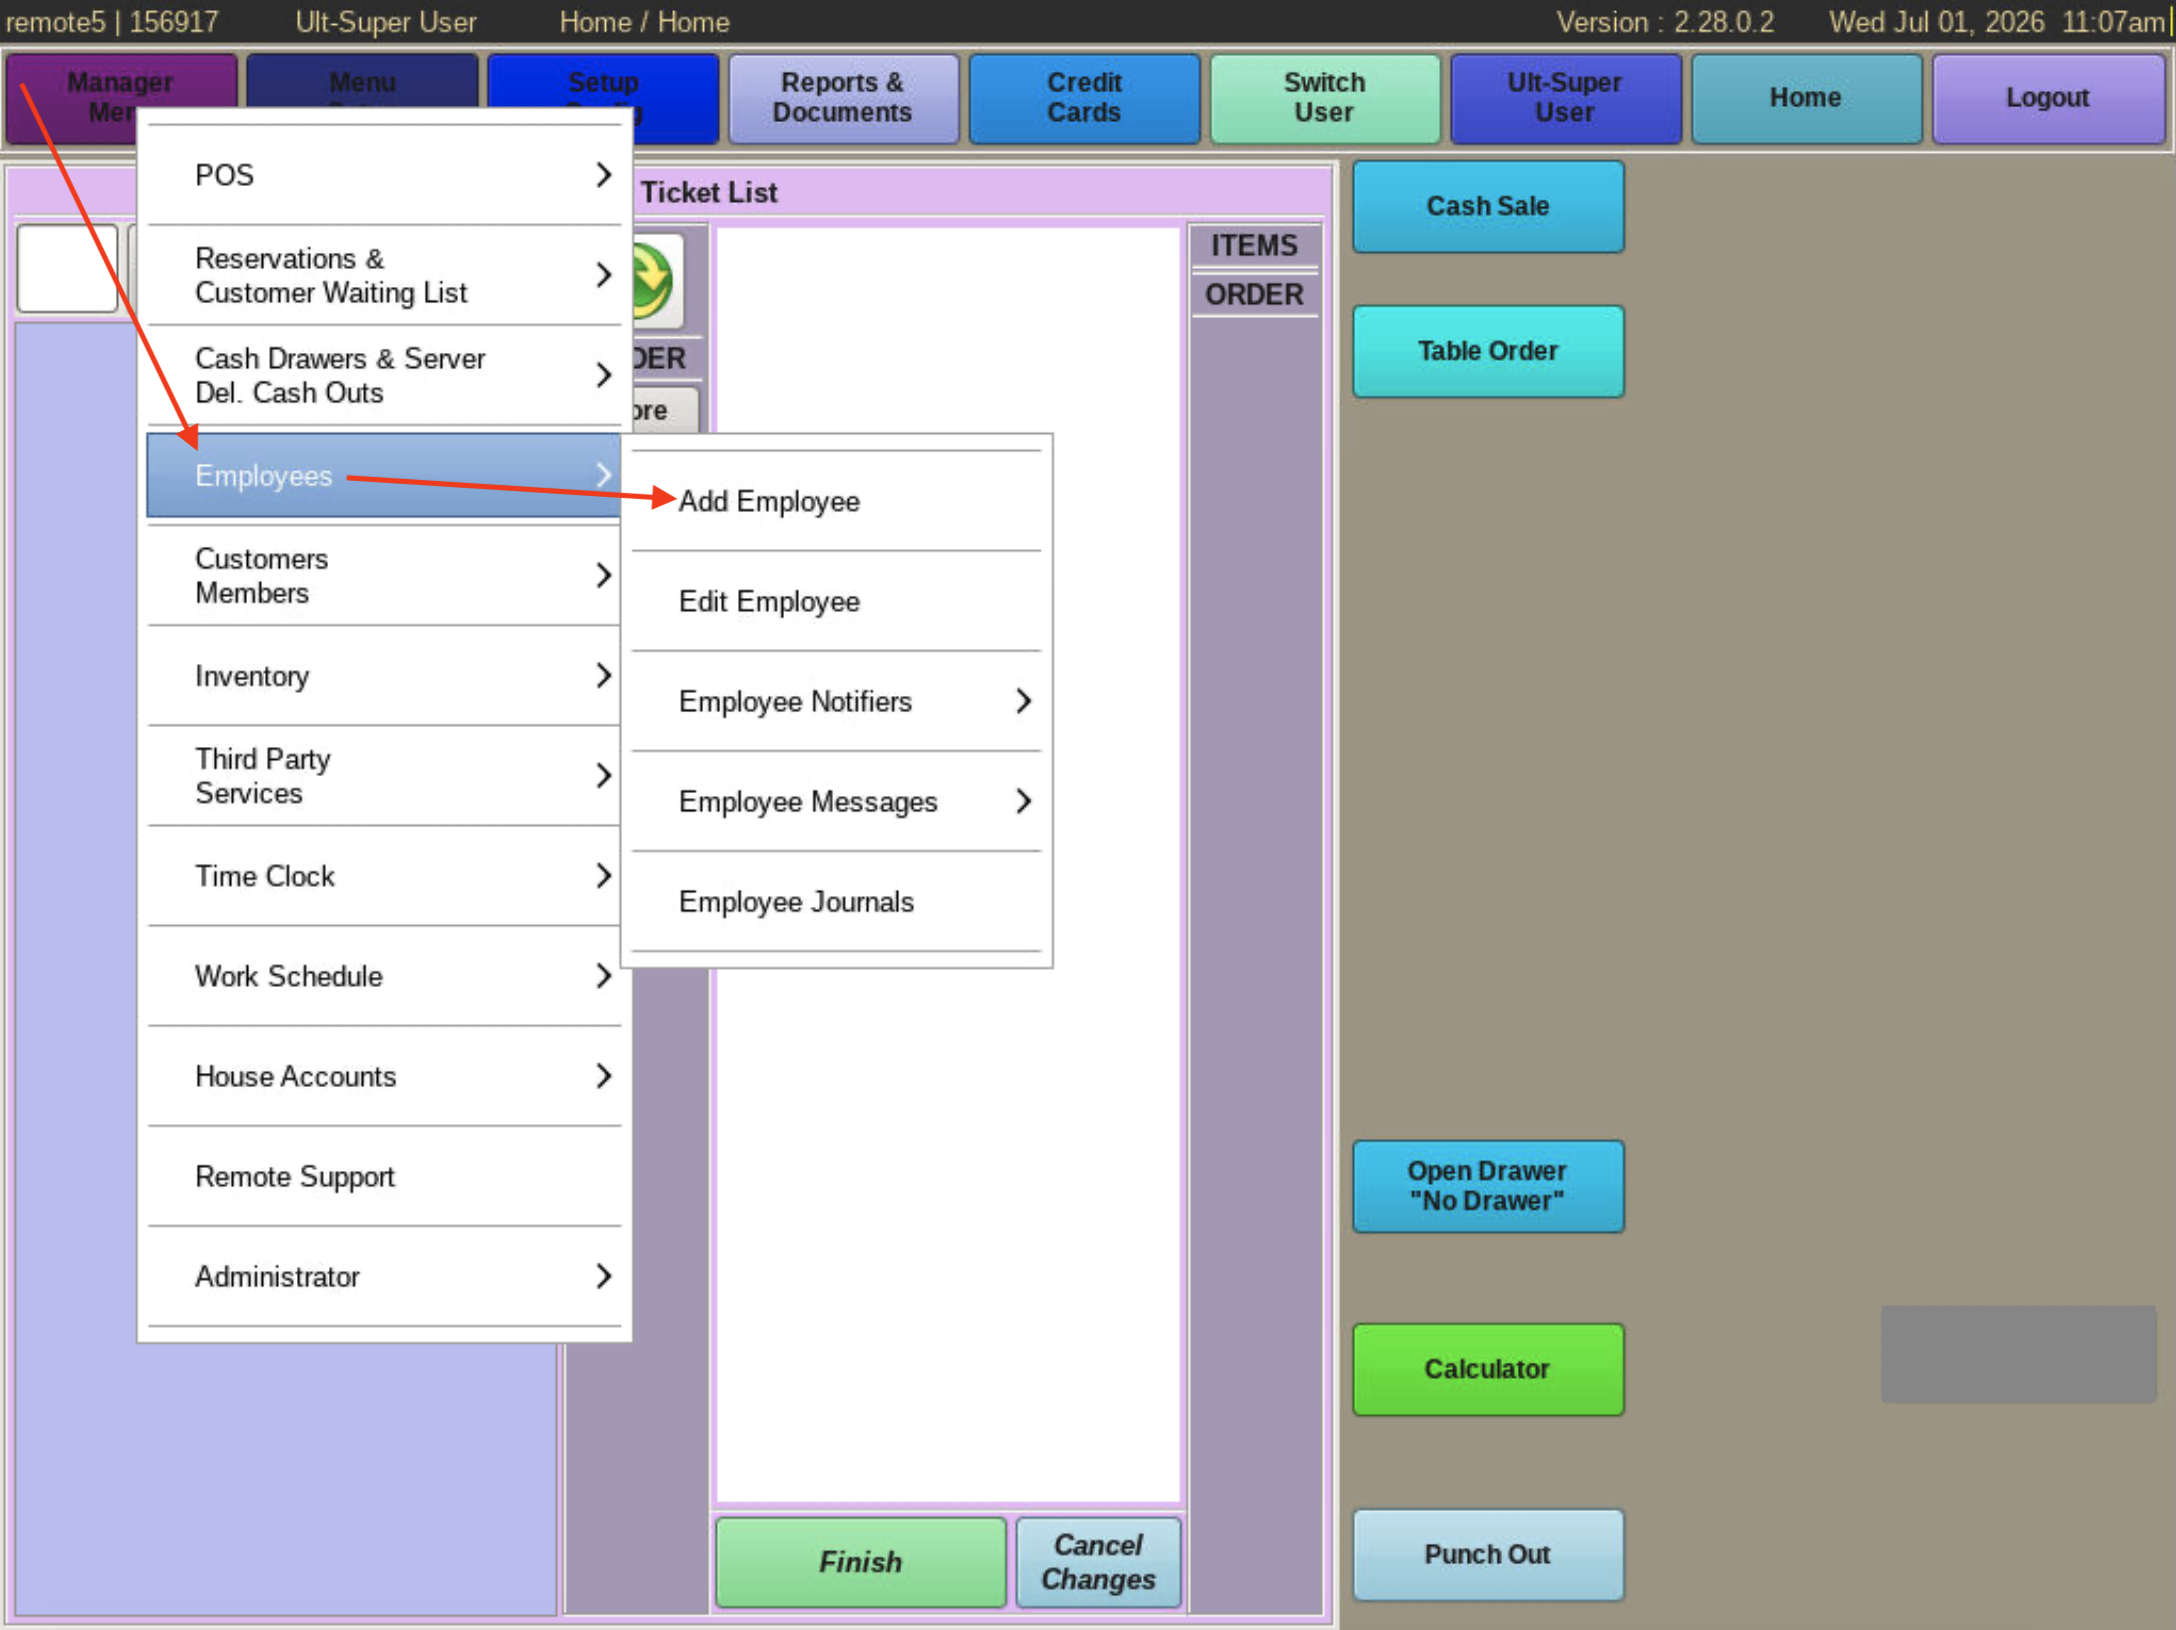
To add a New Employee, select Manager Menu from the buttons at the top of the home screen.
Then go to Employees and choose Add Employees.
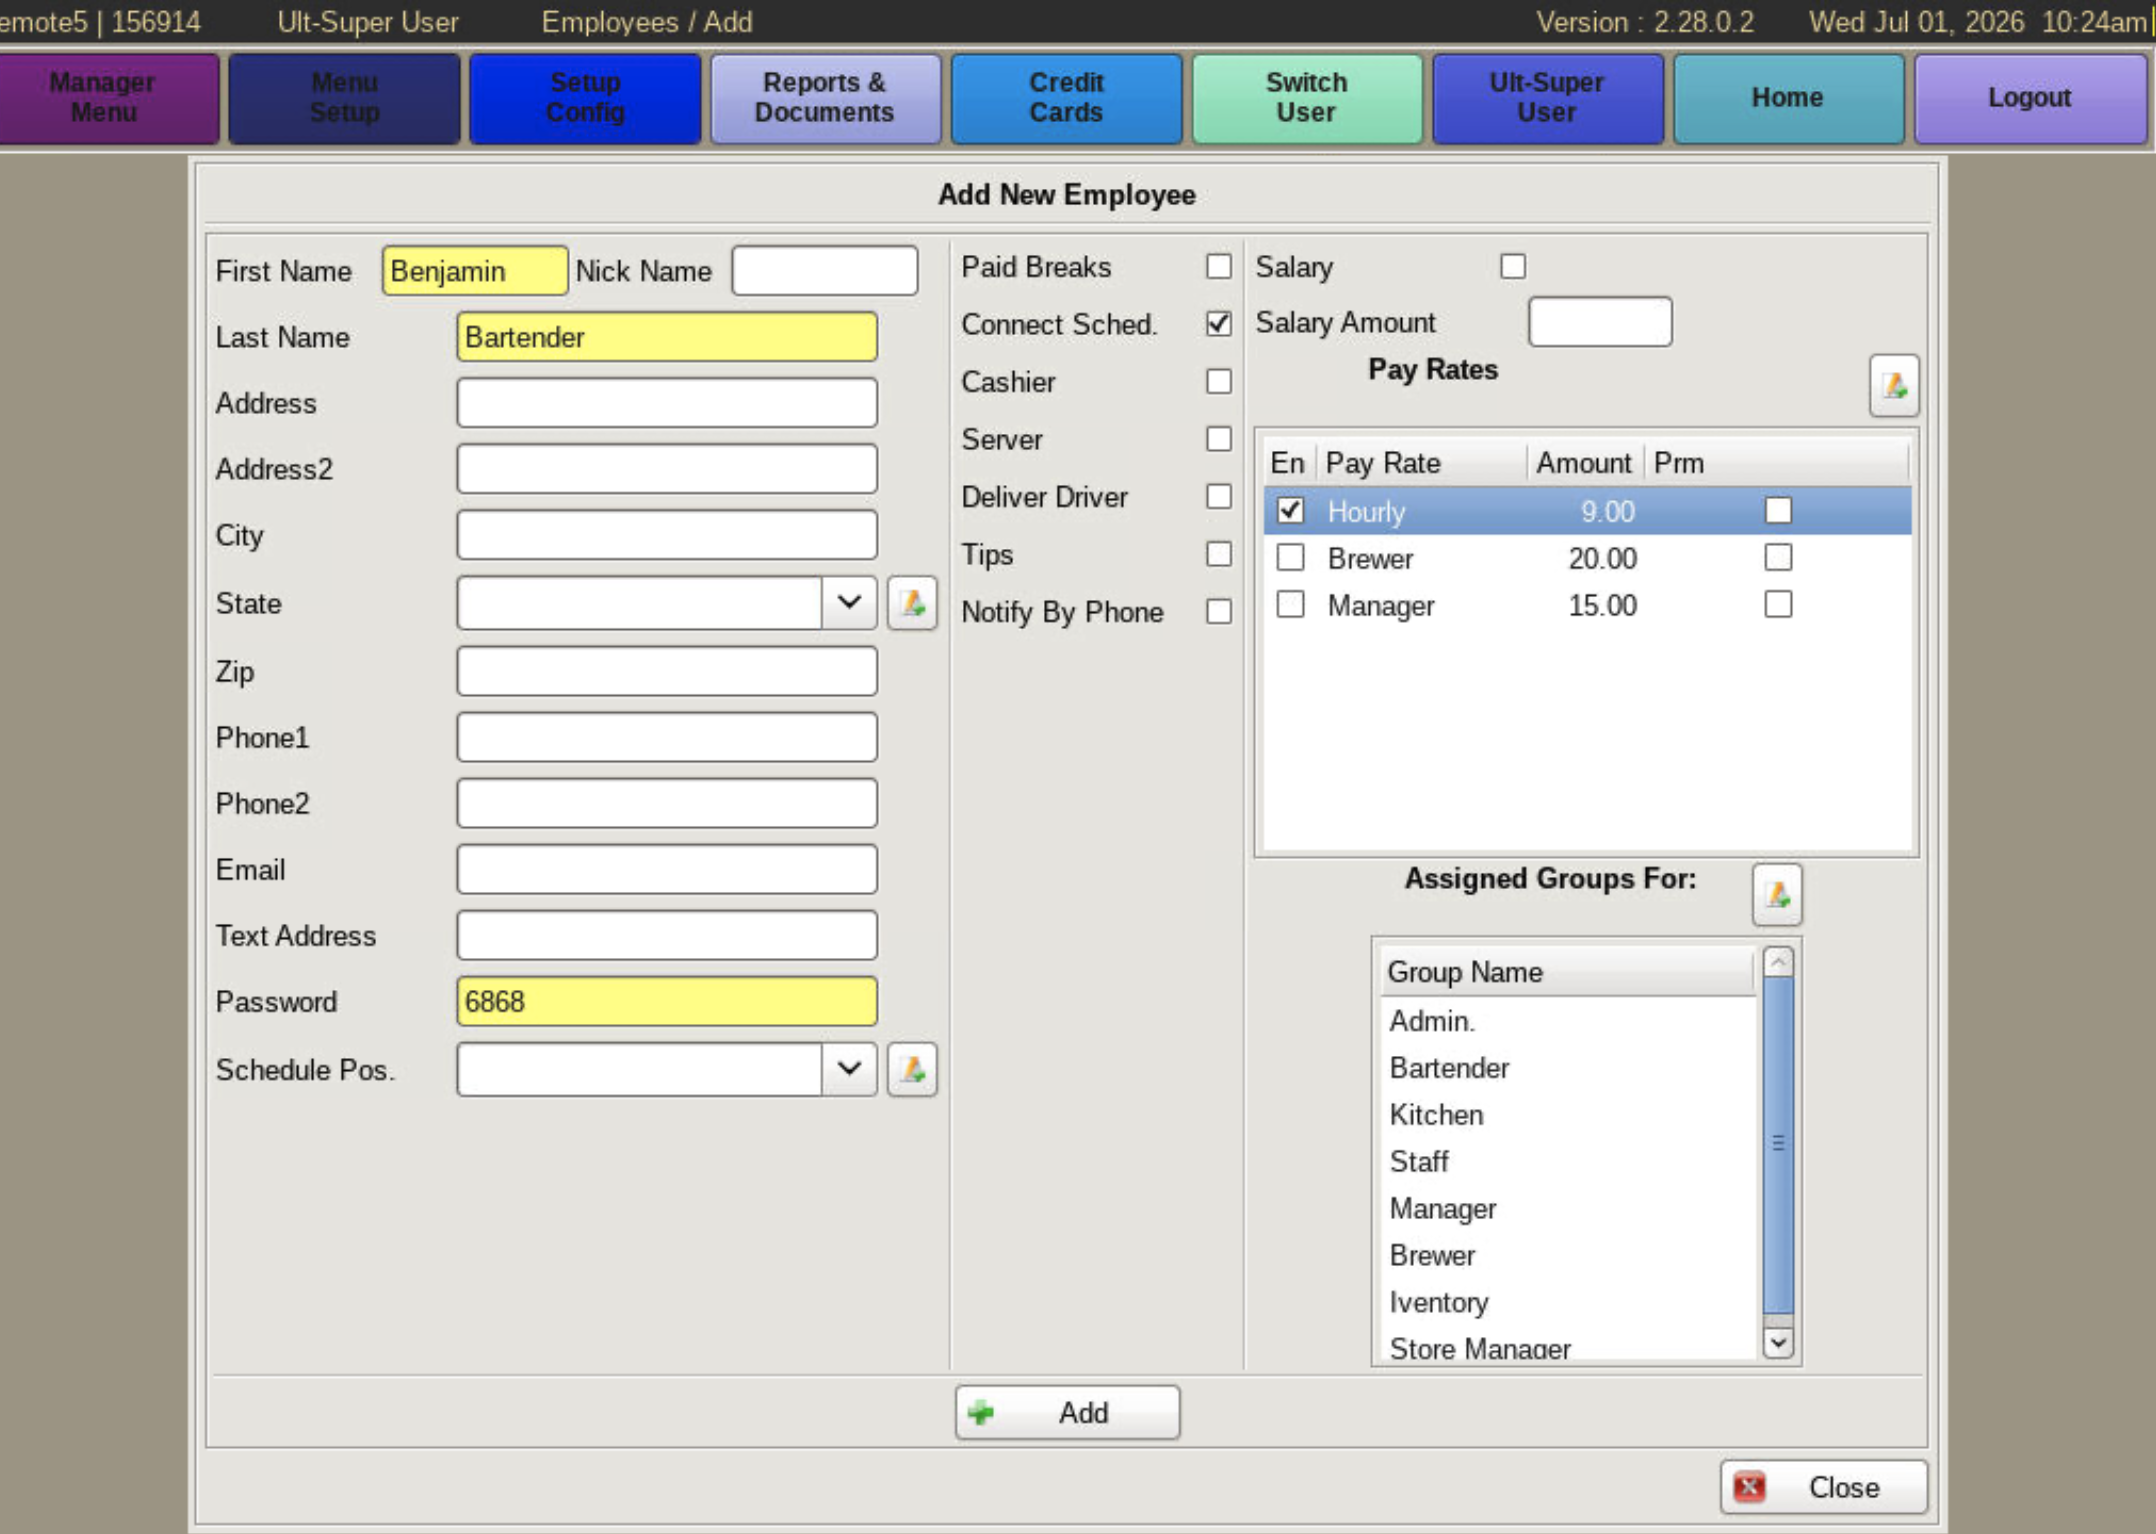
From this menu, you will add information about the employee.
On the left hand side, the fields in yellow, First Name, Last Name, and Password, are required fields. You can also fill in the employee's Address, Phone Numbers, and Email if you'd like.
Below that you can use the check boxes to set employee options; Paid Breaks, Connect Sched, Cashier, Server, Delivery Driver, Tips.
Paid Breaks: When calculating time clock reports, break time will not be subtracted from the hours total or overtime total.
Connect Sched: If you are using the rok schedule in the POS and have "link to Work Schedule" checked in Time Clock Setup, you can disable it for this employee.
Cashier: This will allow this emloyee to use/be assigned to a cash drawer.
Server/Delivery Driver: This will allow this employee to assign themselves a Server/Delivery Cash Out. Note: An employee can only be assigned to either the cashier to have a cash drawer or a Server/Delivery to have an on-person cash bank, not both at the same time.
Tips: Enabling this will prompt the employee to declare their tips when punching out.
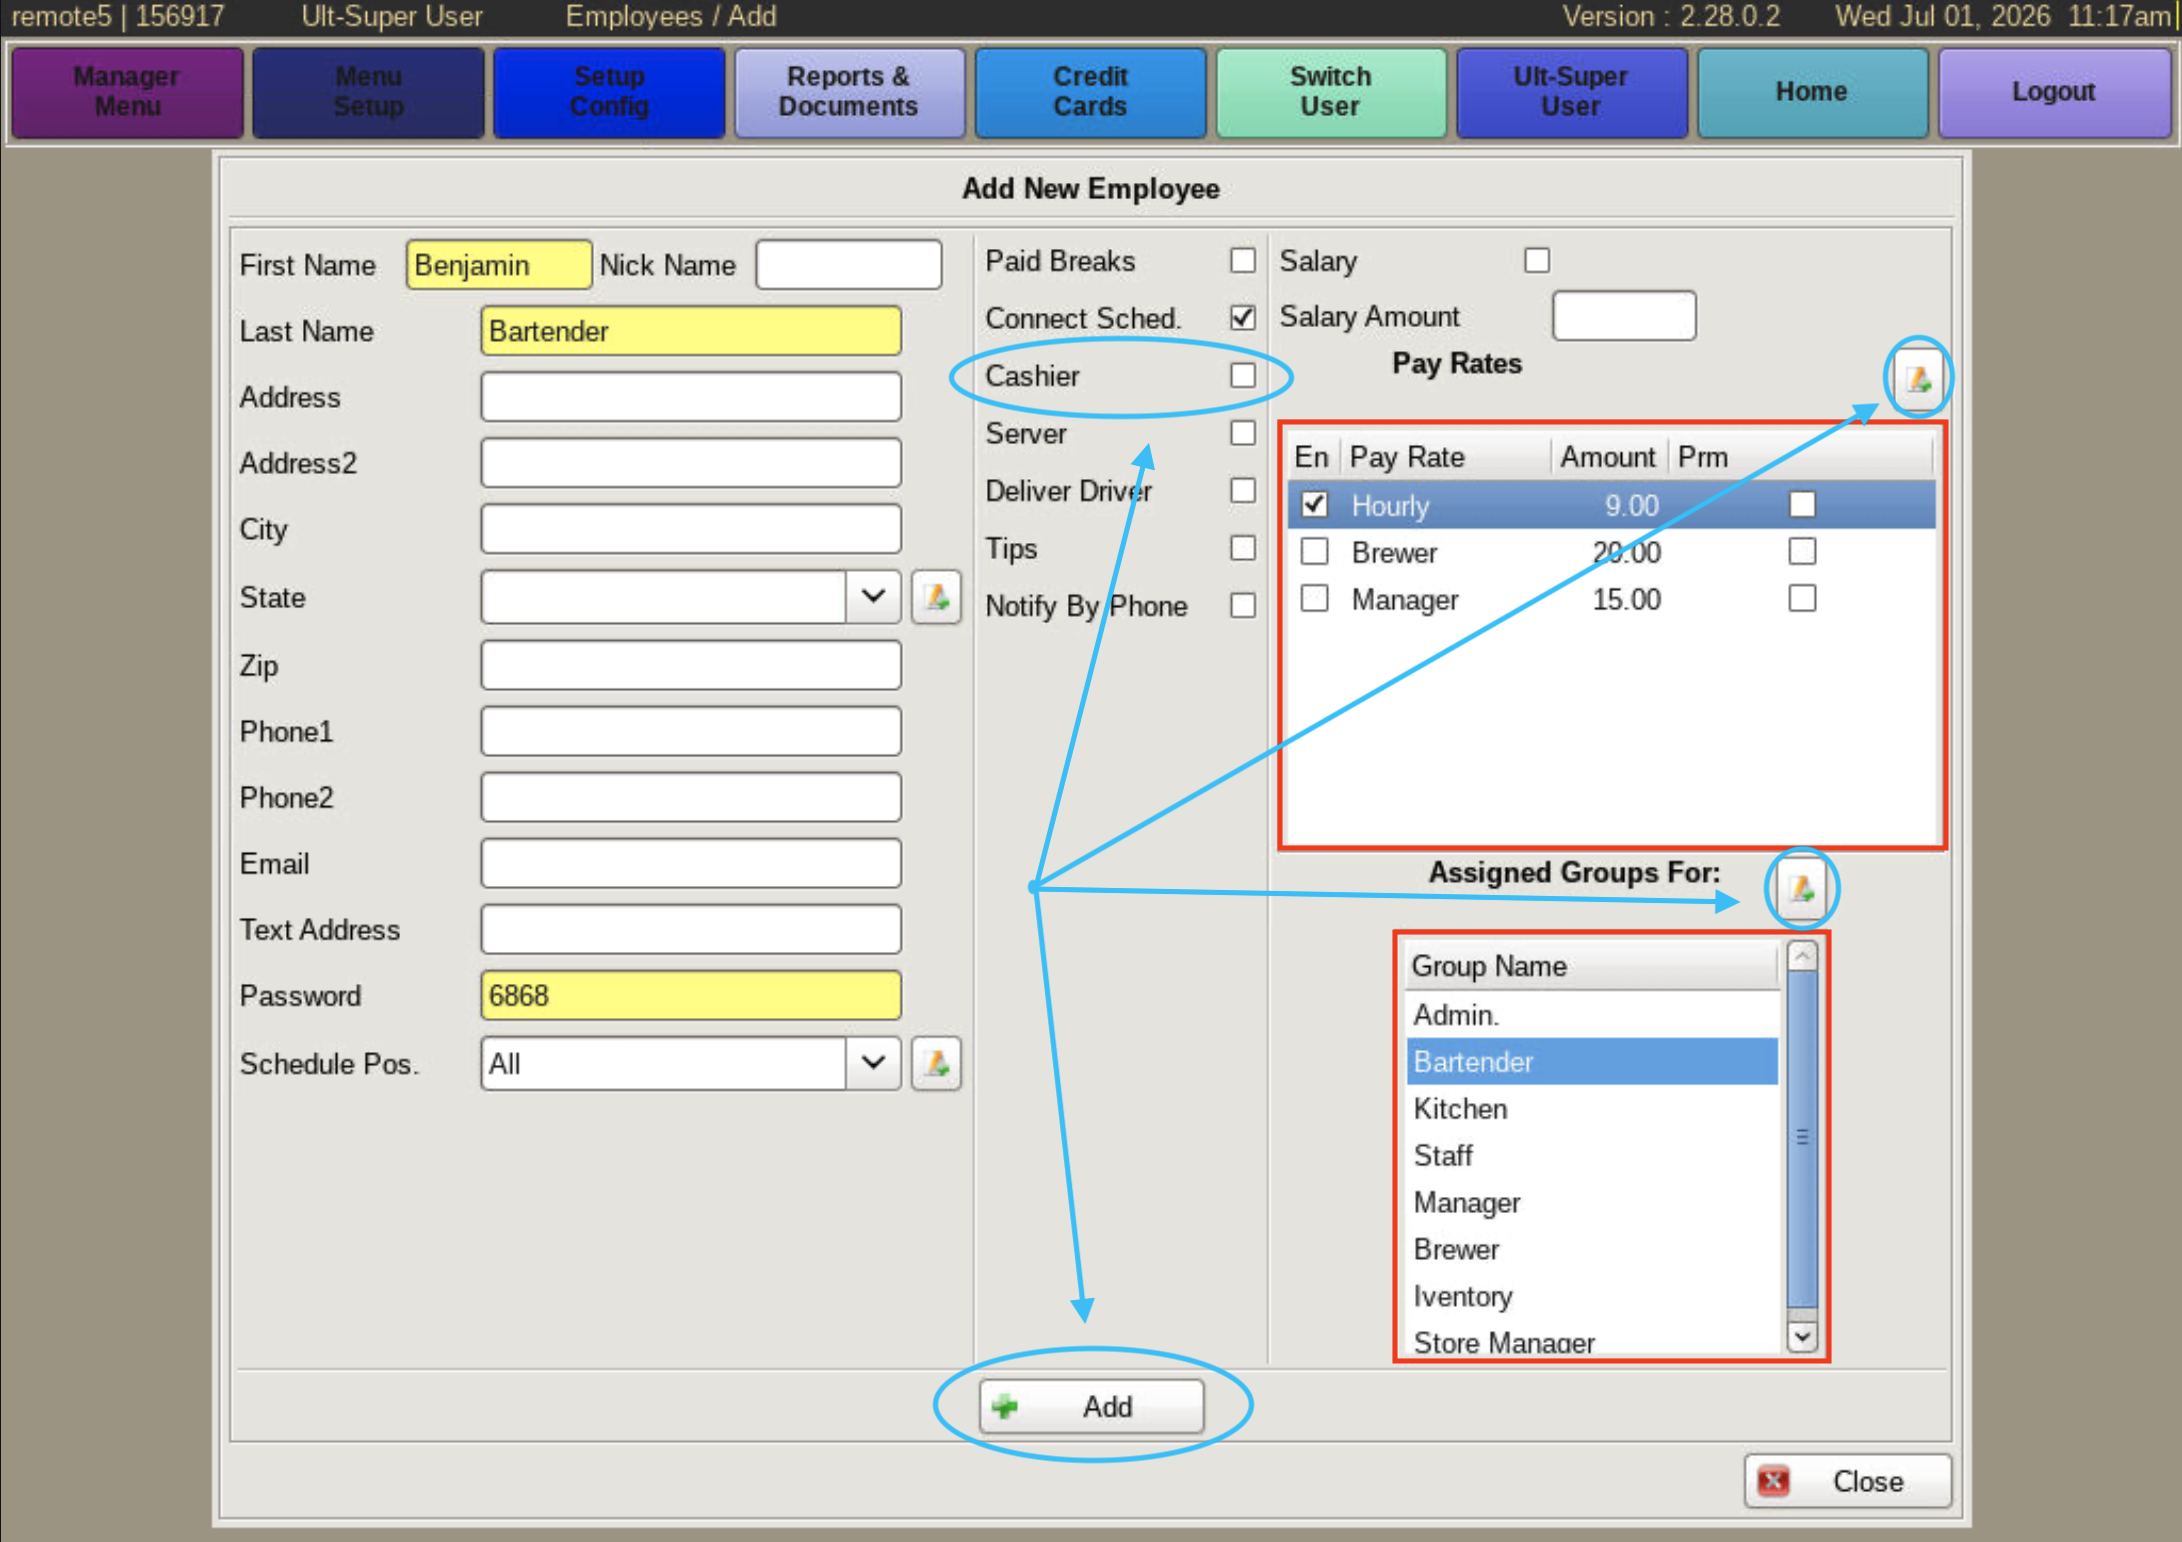
*In the middle you will see Cashier circled. If you want an employee to be able to use a cash drawer, you must check the box next to Cashier.
Pay Rates- On the right hand side you will see the employee Pay Rates. Here you can check the Salary box if they are salaried, and enter the Salary Amount or in the Pay Rates section, you can assign the employee to one pay rate or multiple pay rates, such as Hourly, Bartender, Server, Manager, Brewer, and Staff. This affects the clock in screen because when the employee clocks in they have the position options that they can clock in as for that shift.
There is a button circled in blue above the pay rates box that is used to create a new Pay Rate label. Once you have created the pay rates, you can choose to enable them by checking the En box the left of the appropriate Pay Rate for that employee that you created in the POS.
If the Salary button is not selected or there is no Pay Rate selected, the employees will not be able to punch in.
You will see in the Pay Rates box hightlighted in red. Pay Rates can be specific to each employee if needed. Enter the pay amount for the employee you are adding, in the Amount field next to the Pay Rate labels that you have created.
Group Name- There is another box underneath the Pay Rates box that is highlighted in red named Group Name. These are groups that have been predefined in the configurations of the POS. These are the easiest way to assign a specific group of employees (Managers, servers, bartenders) the permissions that group of employees needs to do their jobs. The predefined permissions within each group that are already set in the POS when you begin using it, are typical permissions per each group.
Underneath the Pay Rates box there is another button circled in blue that you can use to create Assigned Groups. Groups are used to assign permissions based on what the employee is allowed to do within the POS. This can be used but the predefined Groups are an easier and safer way to assign permissions to your employees.
An example of permissions per group would be that a manager can create a schedule, edit prices, edit employees, and enter inventory. A server can take table orders and a bartender can use a cash drawer. There are many permissions that can be applied to each group. If you choose to add a group or edit permissions, do it carefully so that you do not allow access to the wrong employee such as allowing them to edit pay rates.
You do not need to add and edit employee groups if you do not want to. There are predefined groups with permissions already assigned to them.
*You have to select the appropriate group for the position the employee will be working in so that employee will be able to use the POS.
When you are done entering information on the new employee, click the +Add button.