Editing Employee Information, Roles & Pay Rates
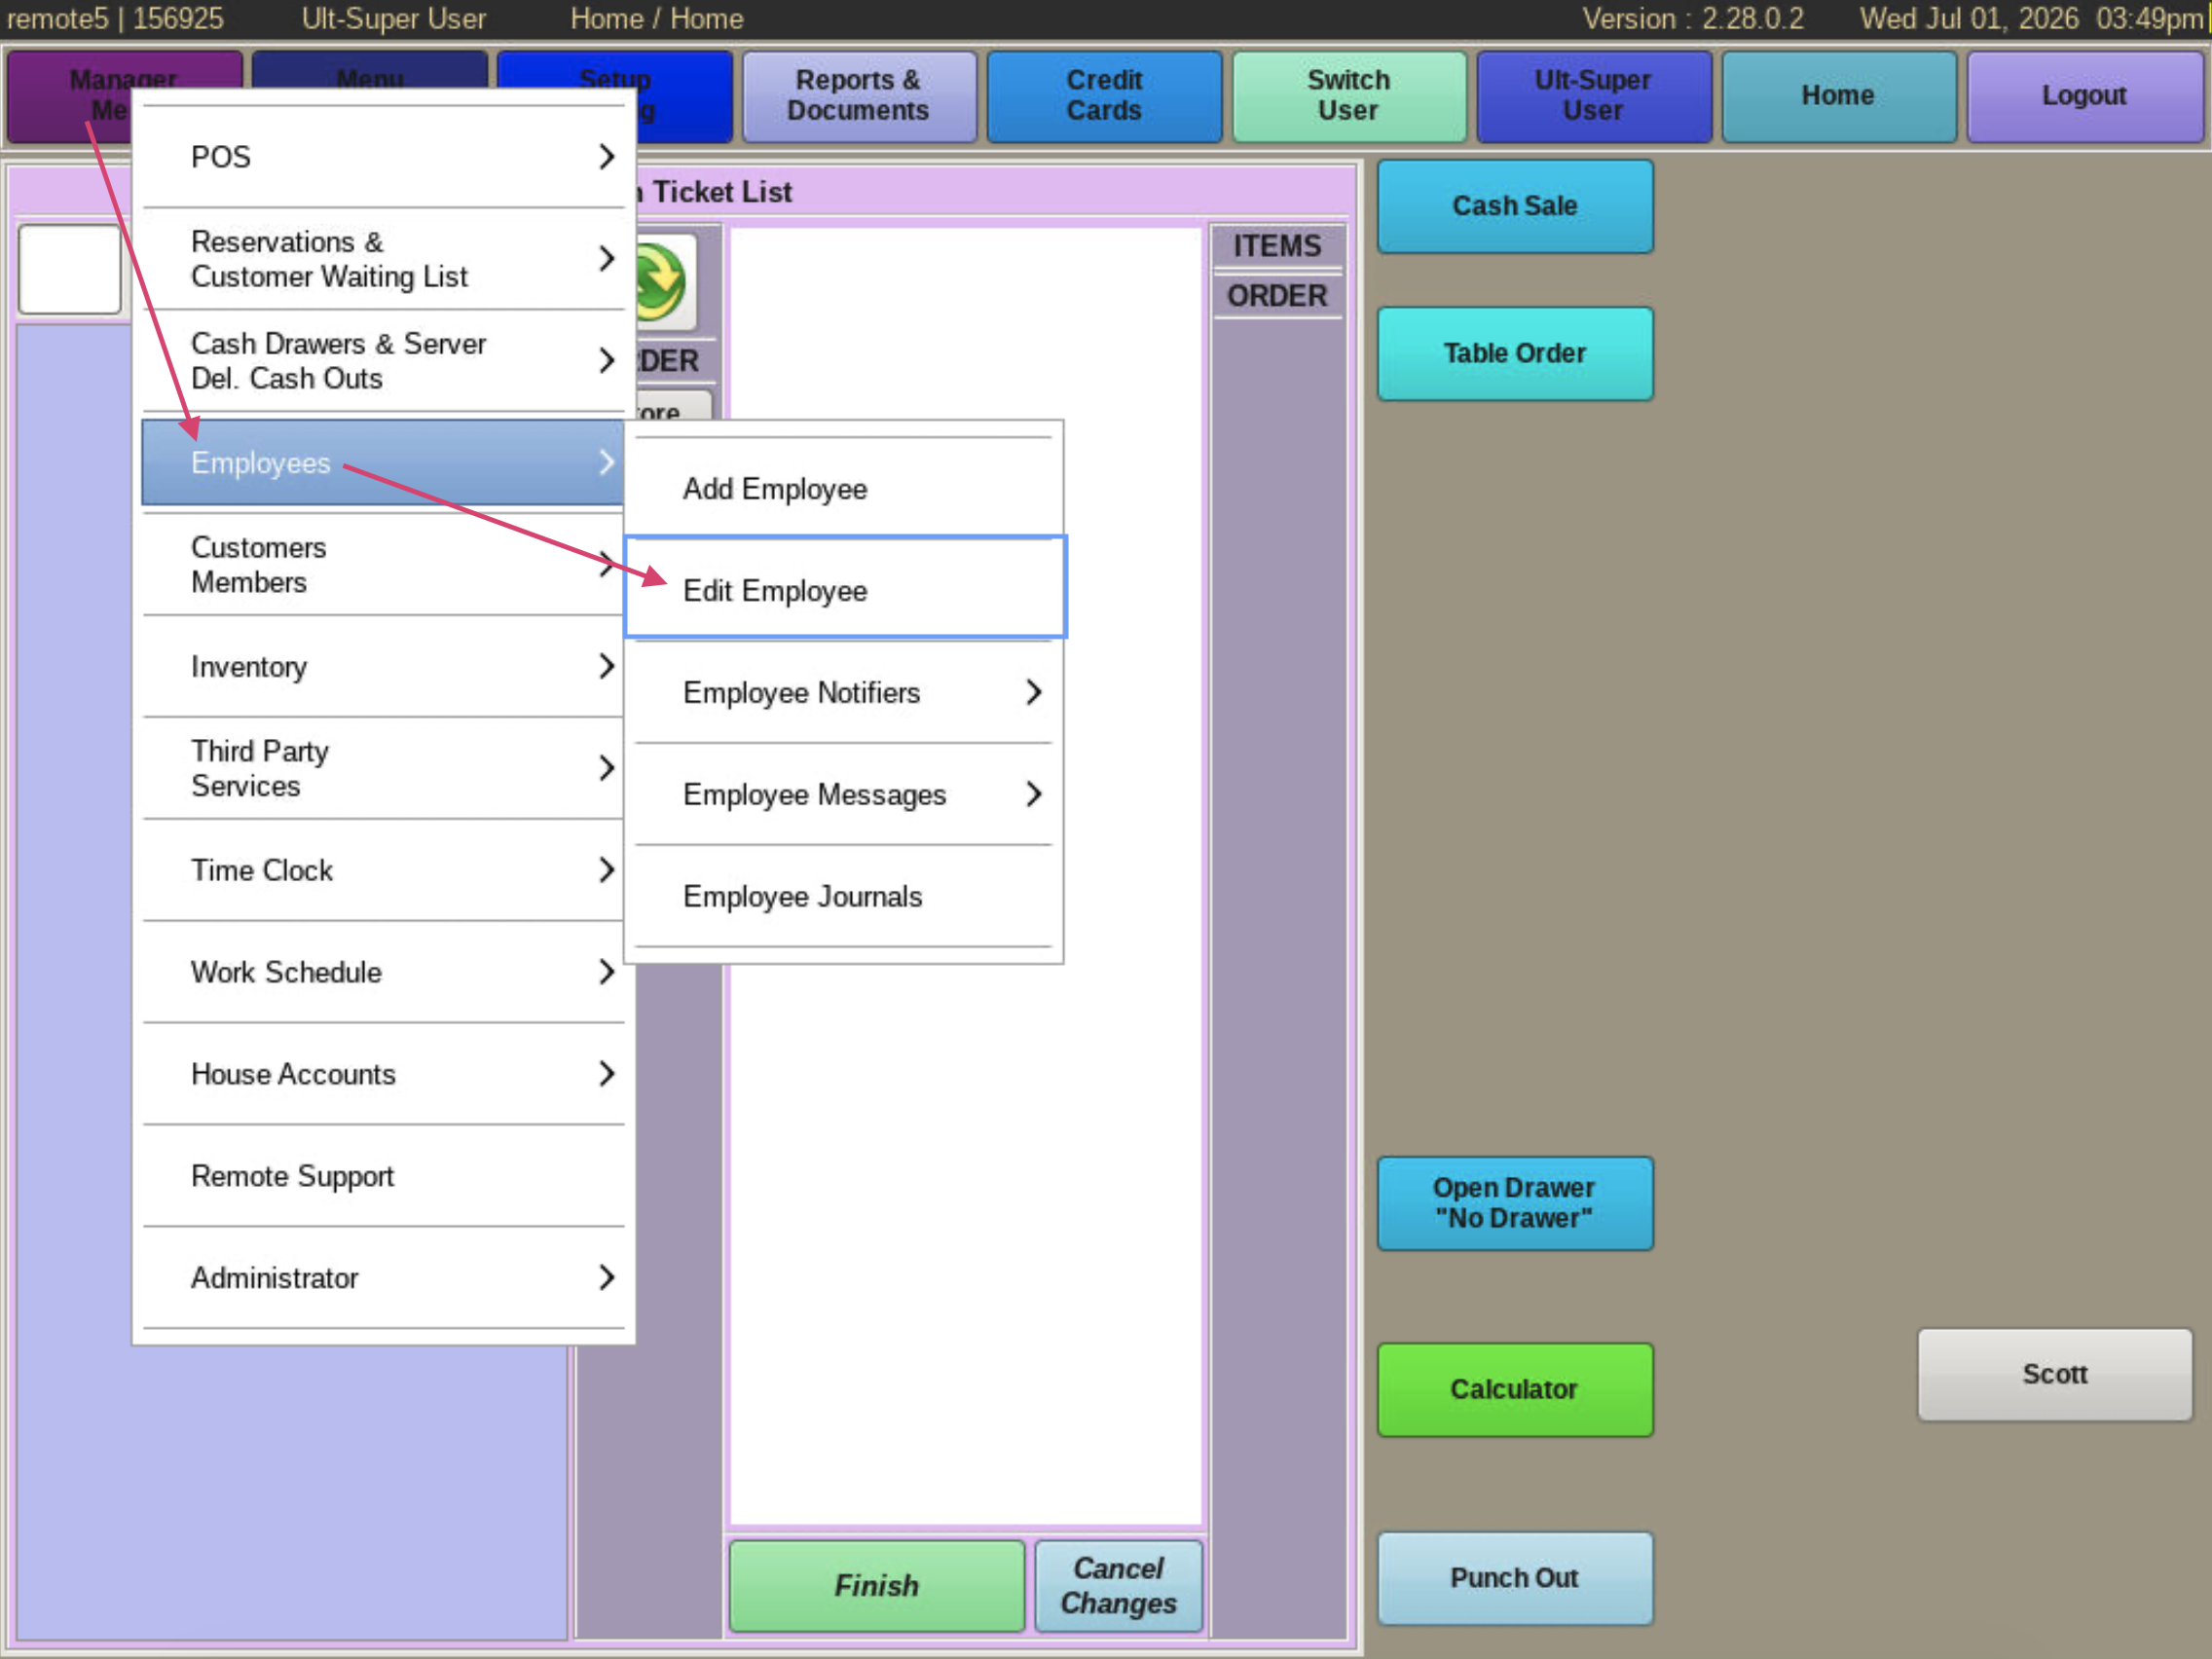
To edit an employee's information, select Manager Menu from the top bar of the home screen.
Then go to Employees and choose Edit Employees.
The Edit Employees button will open the Employees list and options for editing the Employees profile and permissions in the POS.
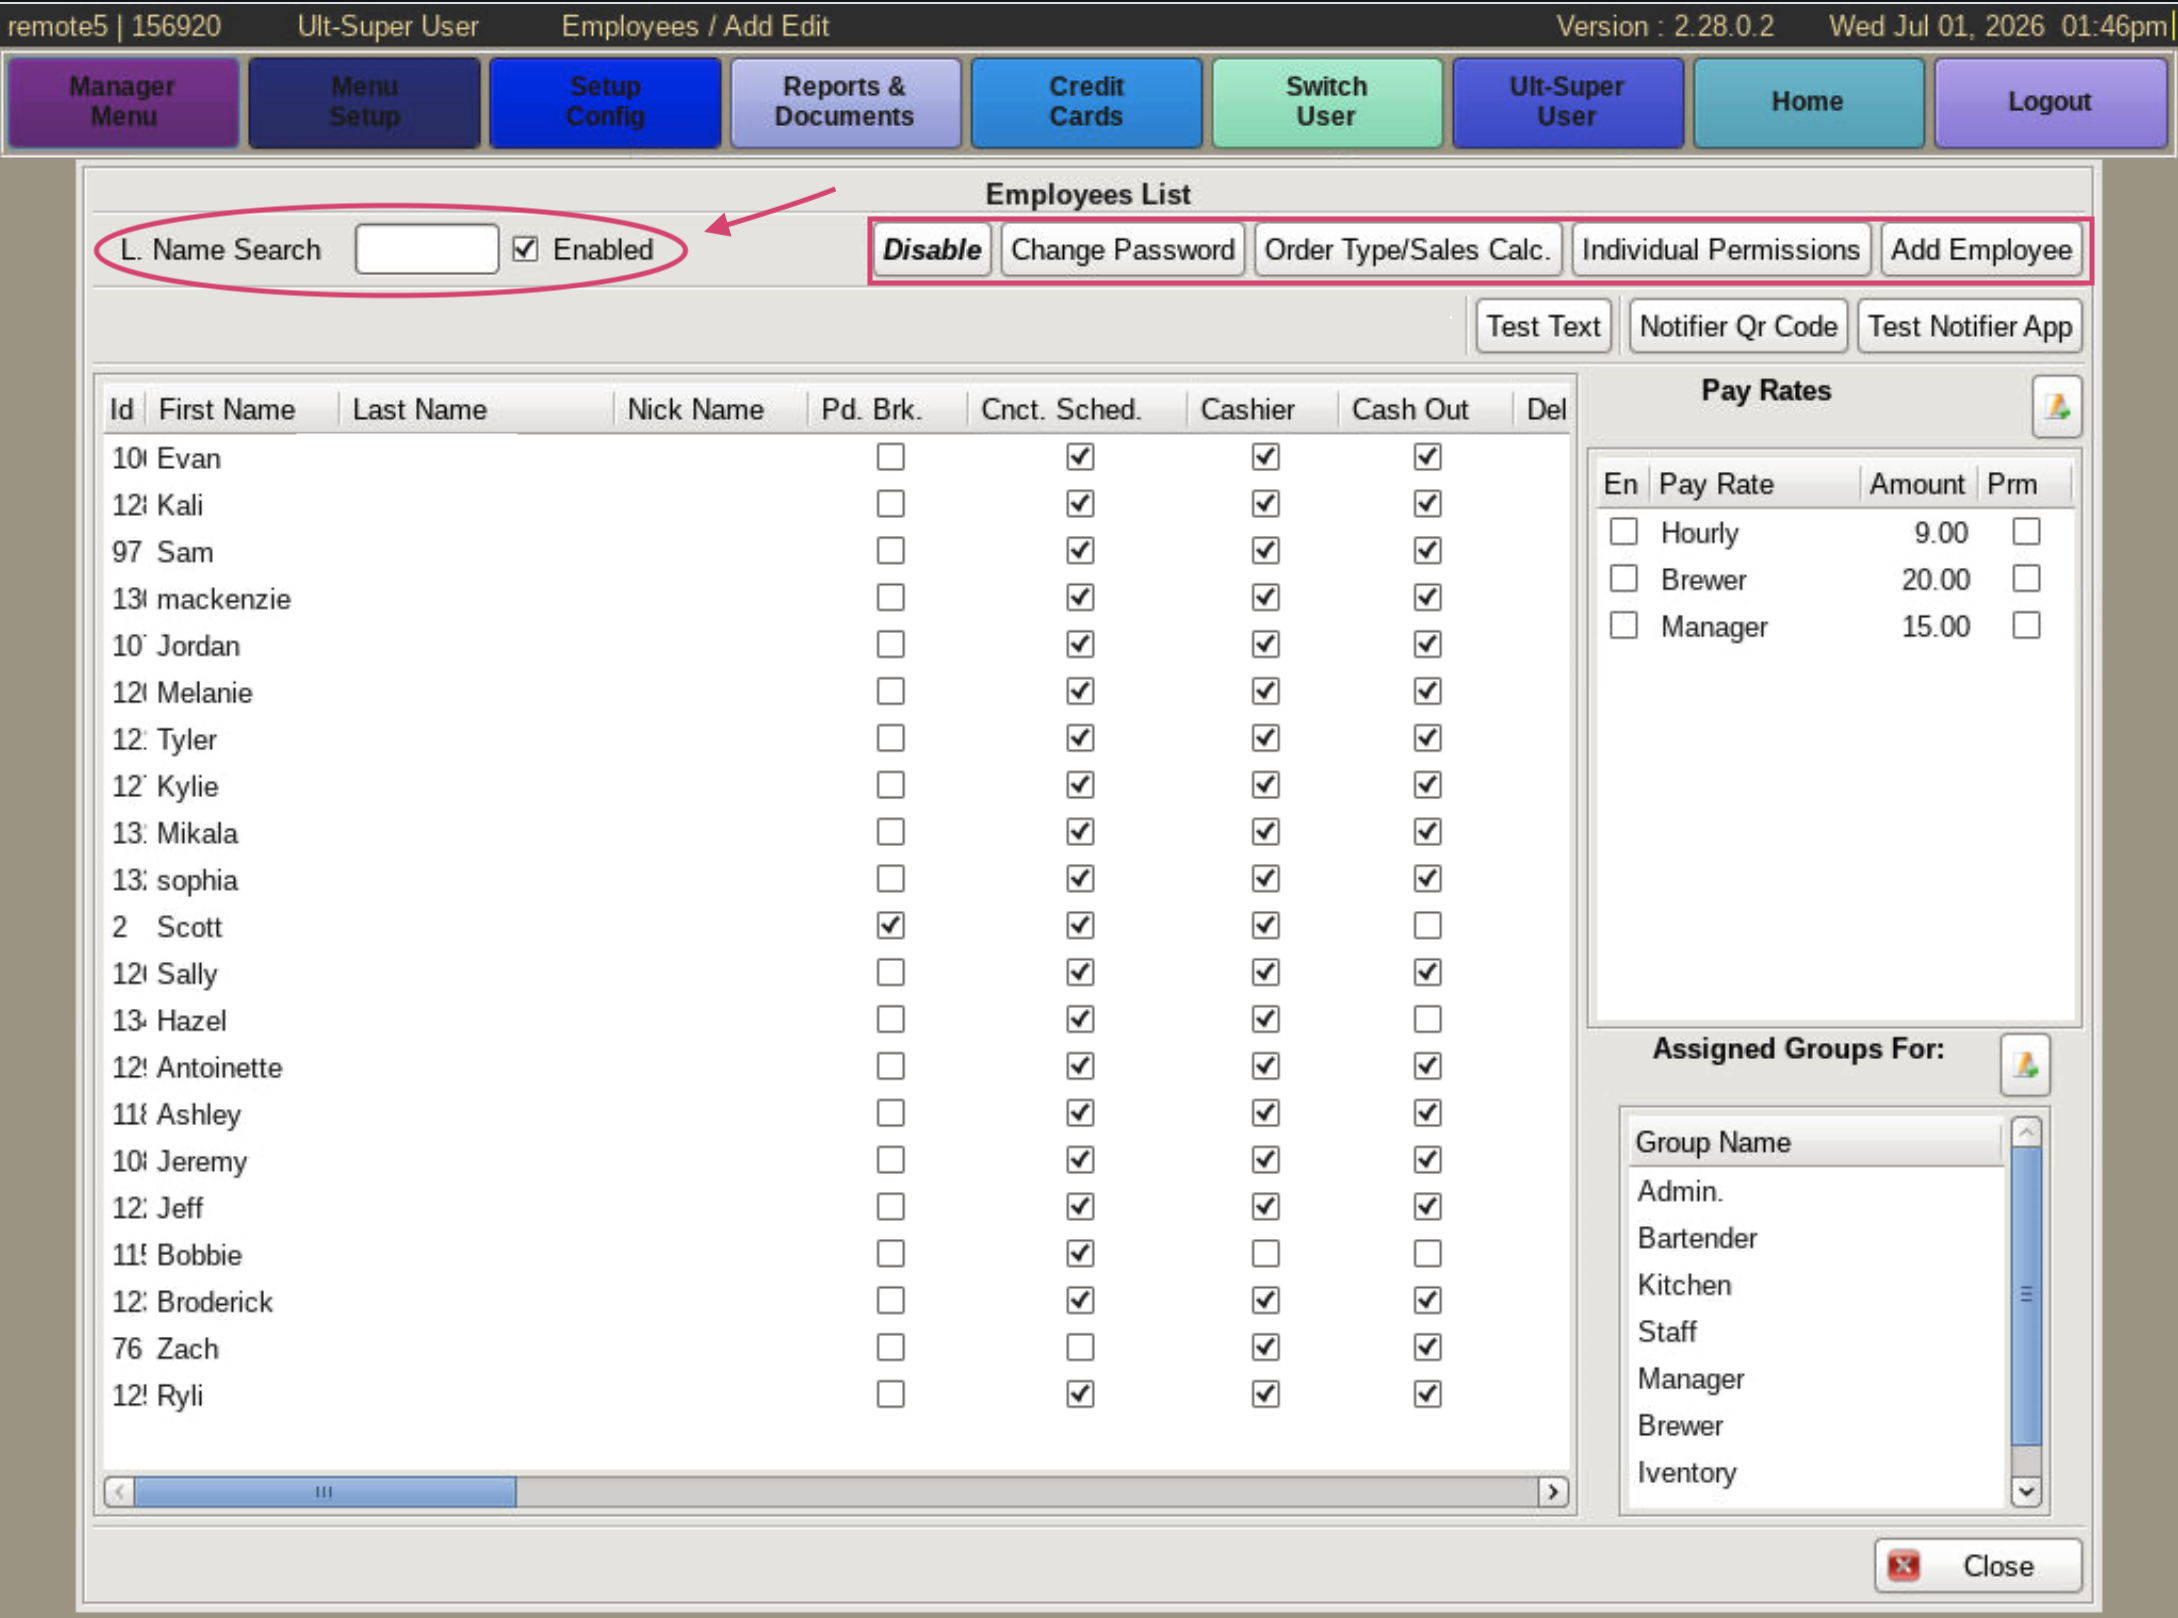
On the top left, you can type in the employee's name in the Search field. Or just click on the employee you need to edit in the list. Here you can edit information, pay rates and permissions for each employee. There is a box right next to the name search box, that you can check that is labeled Enabled. When Enabled is checked, you will see the employees that are enabled to use the POS. If you uncheck the Enabled box you will see employees that are no longer able to use the POS. This is helpful for Enabling returning Employees.
Along the top you will see buttons highlighted with a red circle and rectangle around them named Disable, Change Password, and Order Type/Sales Calc, Individual Permissions, and Add Employee. To use these buttons you must first select the employee that you wish to edit or view in the list.
Button definitions:
Disable: If you have an employee that has quit, and you no longer want them to have access to the POS, as well as remove them from the Enabled employees list, click on the Disable button to stop their POS privilages.
Change Password: To change an employees password click this button. In the pop up window enter the new password and click Set Password.
Order Types/Sales Calc: In this pop up, you can select what order types are totaled to calculate tips percentage of sales. Individual Permissions: When you select this button a Group Permissions screen will pop up. If editing the permissions, it should be done carefully to avoid adding a permission to the wrong employee. Add Employee: This button will open the Add Employee screen.
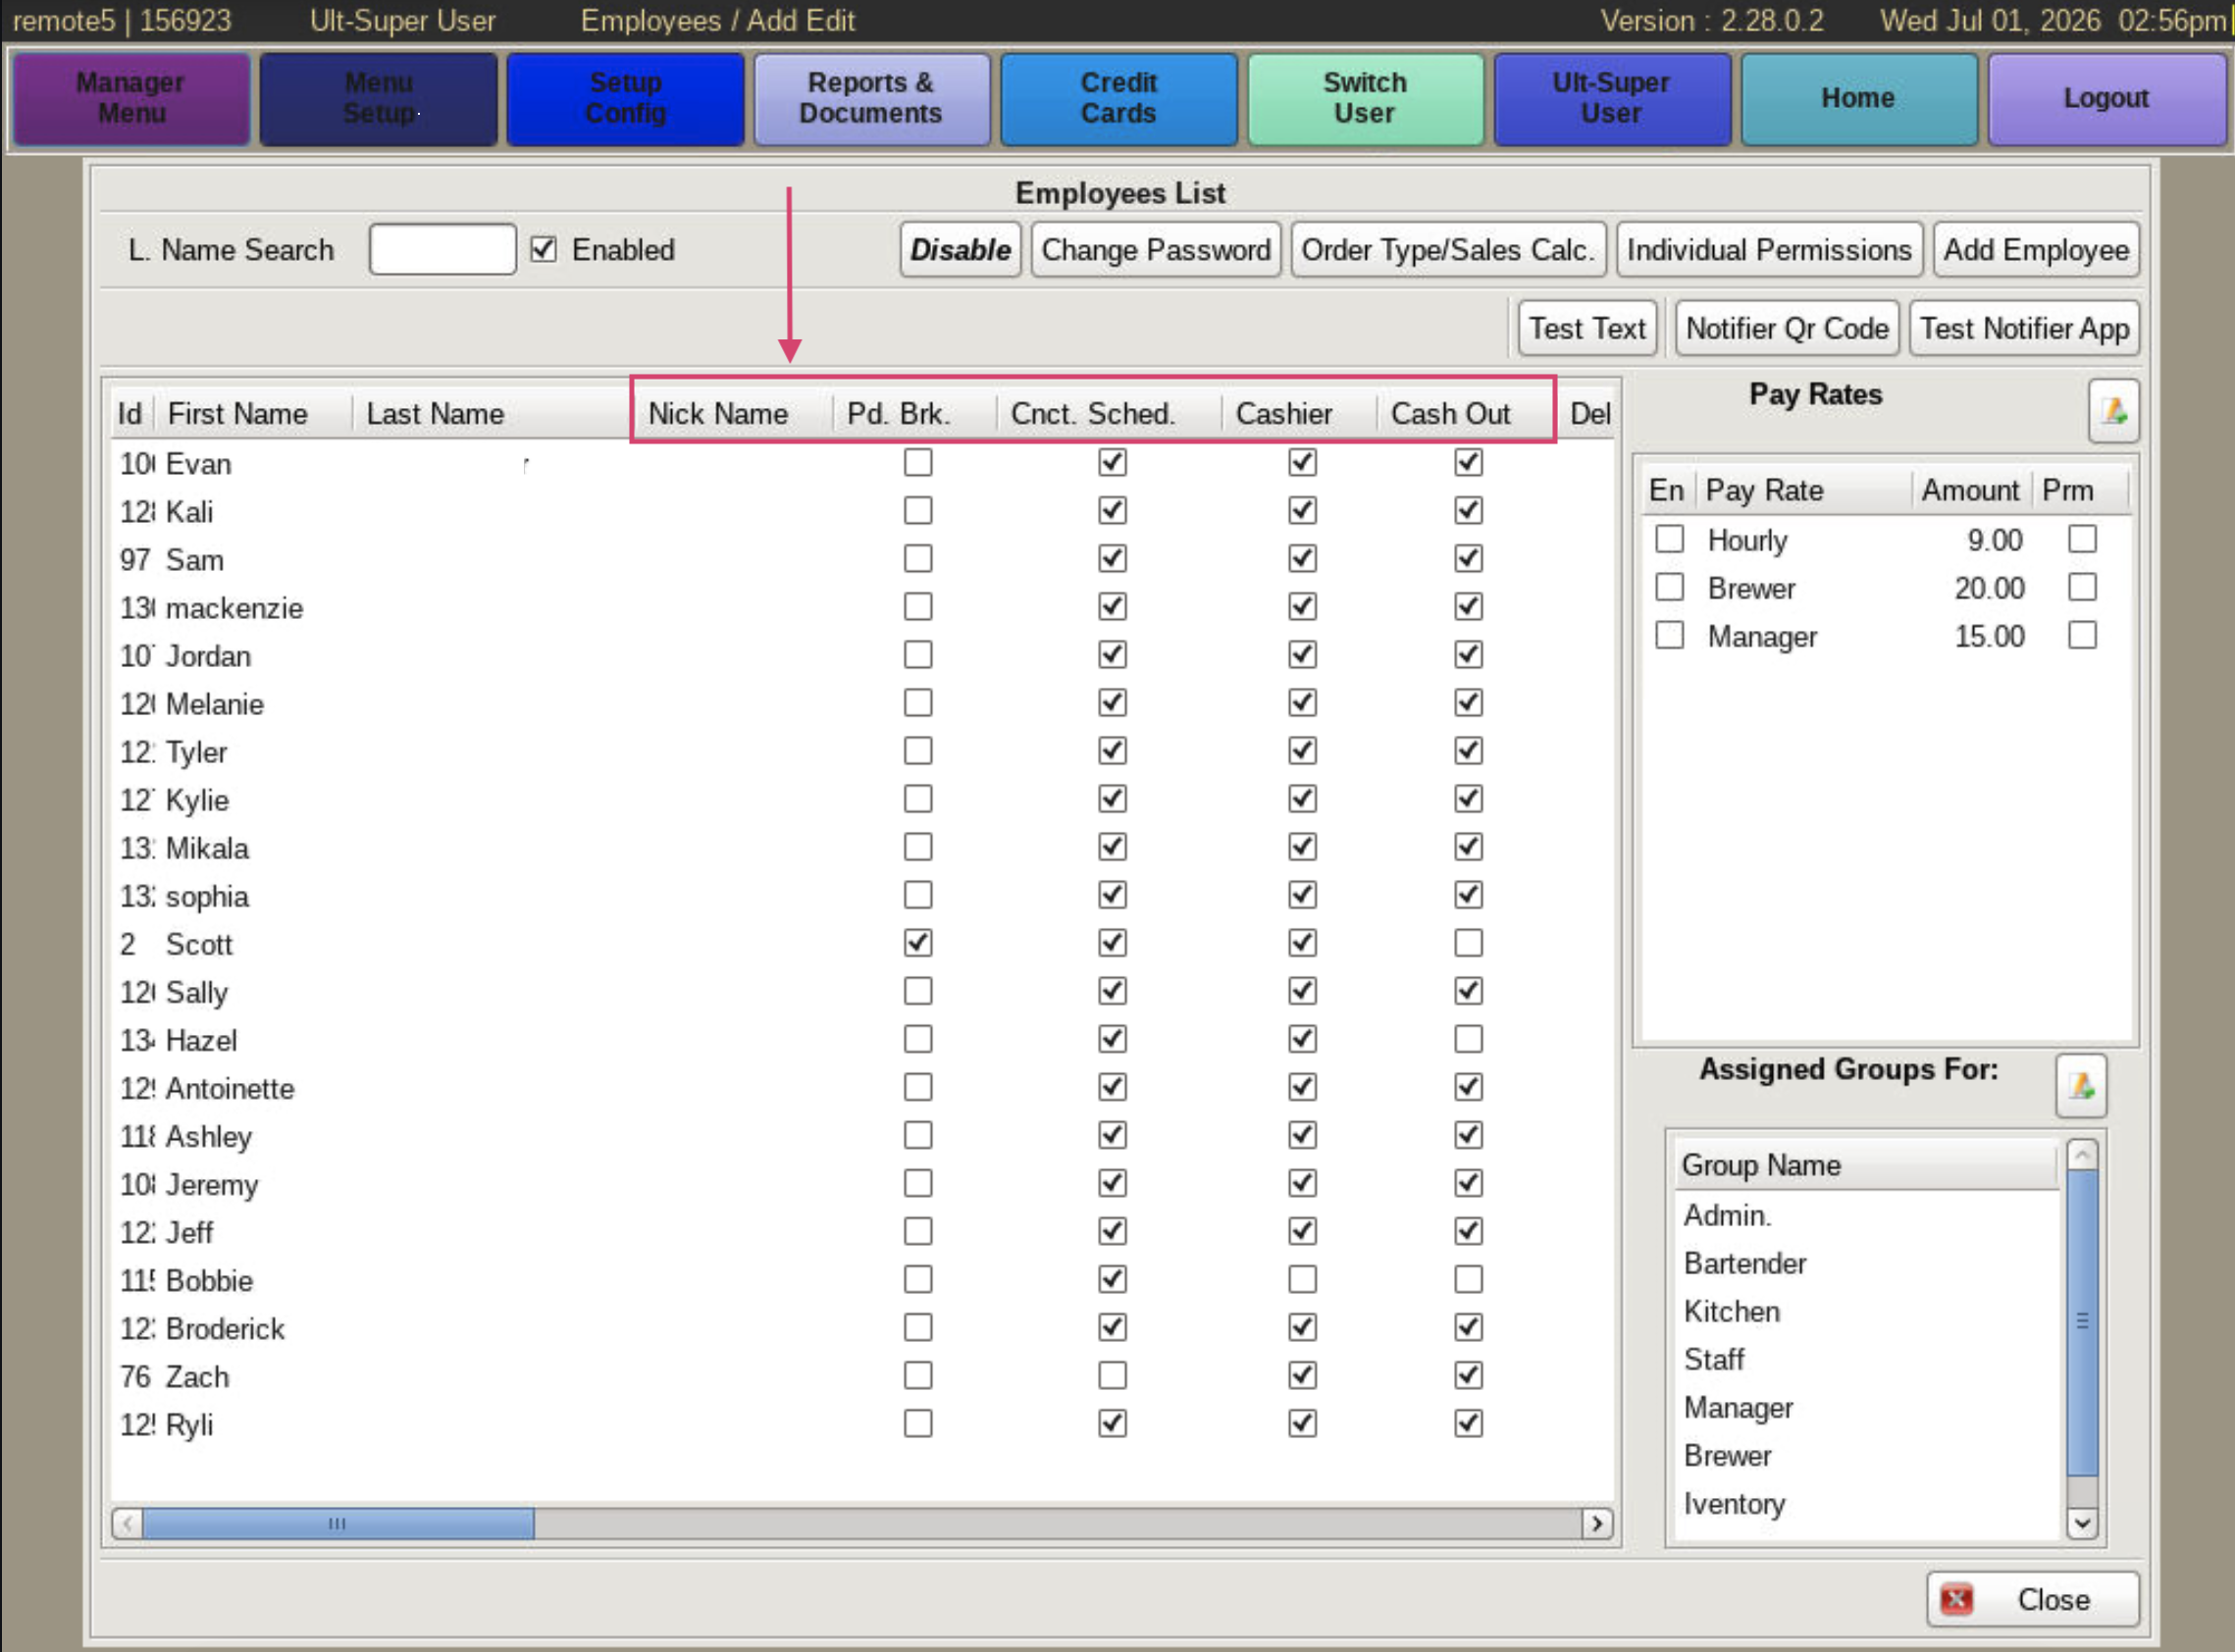
Scrolling to the right you can edit the following fields:
Nickname: If the employee goes by something other than their full name. For instance, if your employee's name is Aaron, but he goes by AJ, you can enter AJ by clicking in the Nickname field. This will turn the field into a text box for you to update the information.
Pd Brk: If checked, this will indicate the employee's breaks are paid. Un-check the box for unpaid breaks.
Cnct. Sched: Checking this will put the employees name on the schedule in the POS
Cashier: If Cashier is checked, then this employee can be assigned to, or added to a cash drawer.
Cash Out: Cash Out is checked when the employee has their own server/delivery bank, and is not assigned a cash drawer.
Note: Cashier and Cash Out can both be checked at the same time. However, you can not have a server cash out and be assigned to a cash drawer at the same time, or vice versa.
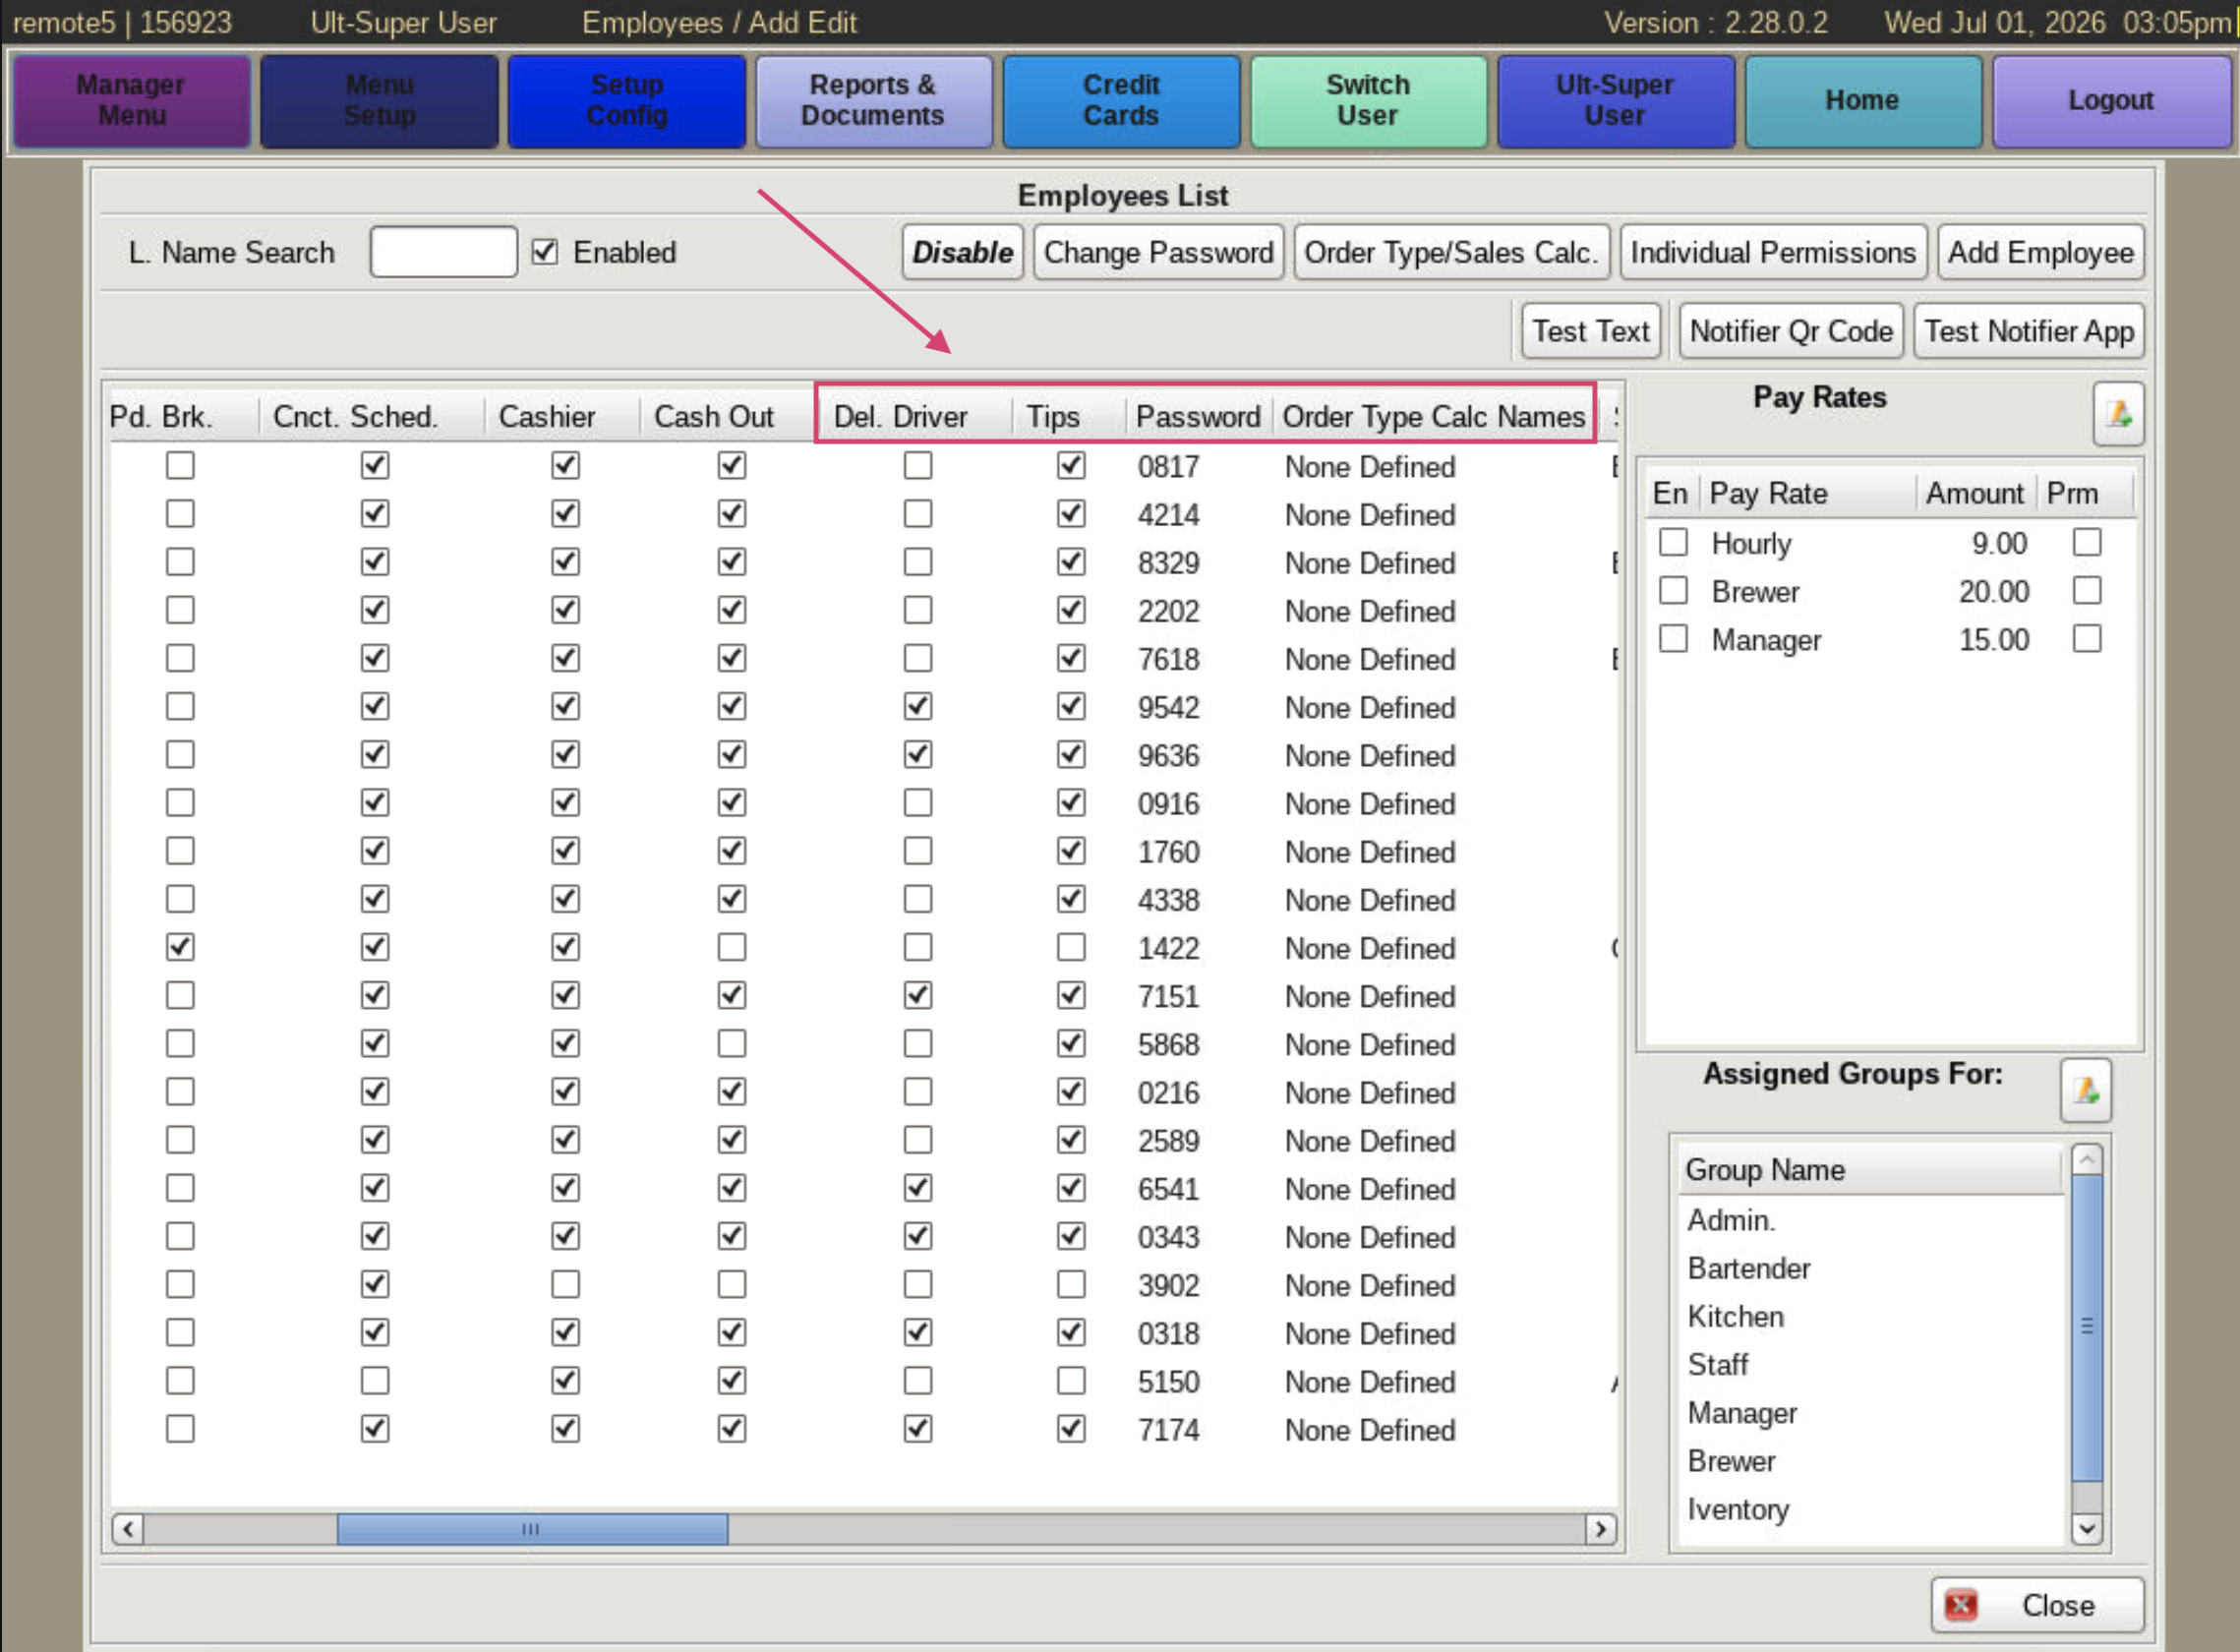
Del Driver: This is checked when your employee does deliveries.
Tips: This indicates whether they will have tips to enter in to the system before punching out.
Password: The passwords will only show up if you are signed in as an admin.
Order Type Calc Names: This will define what order types go in to the tip calculation.
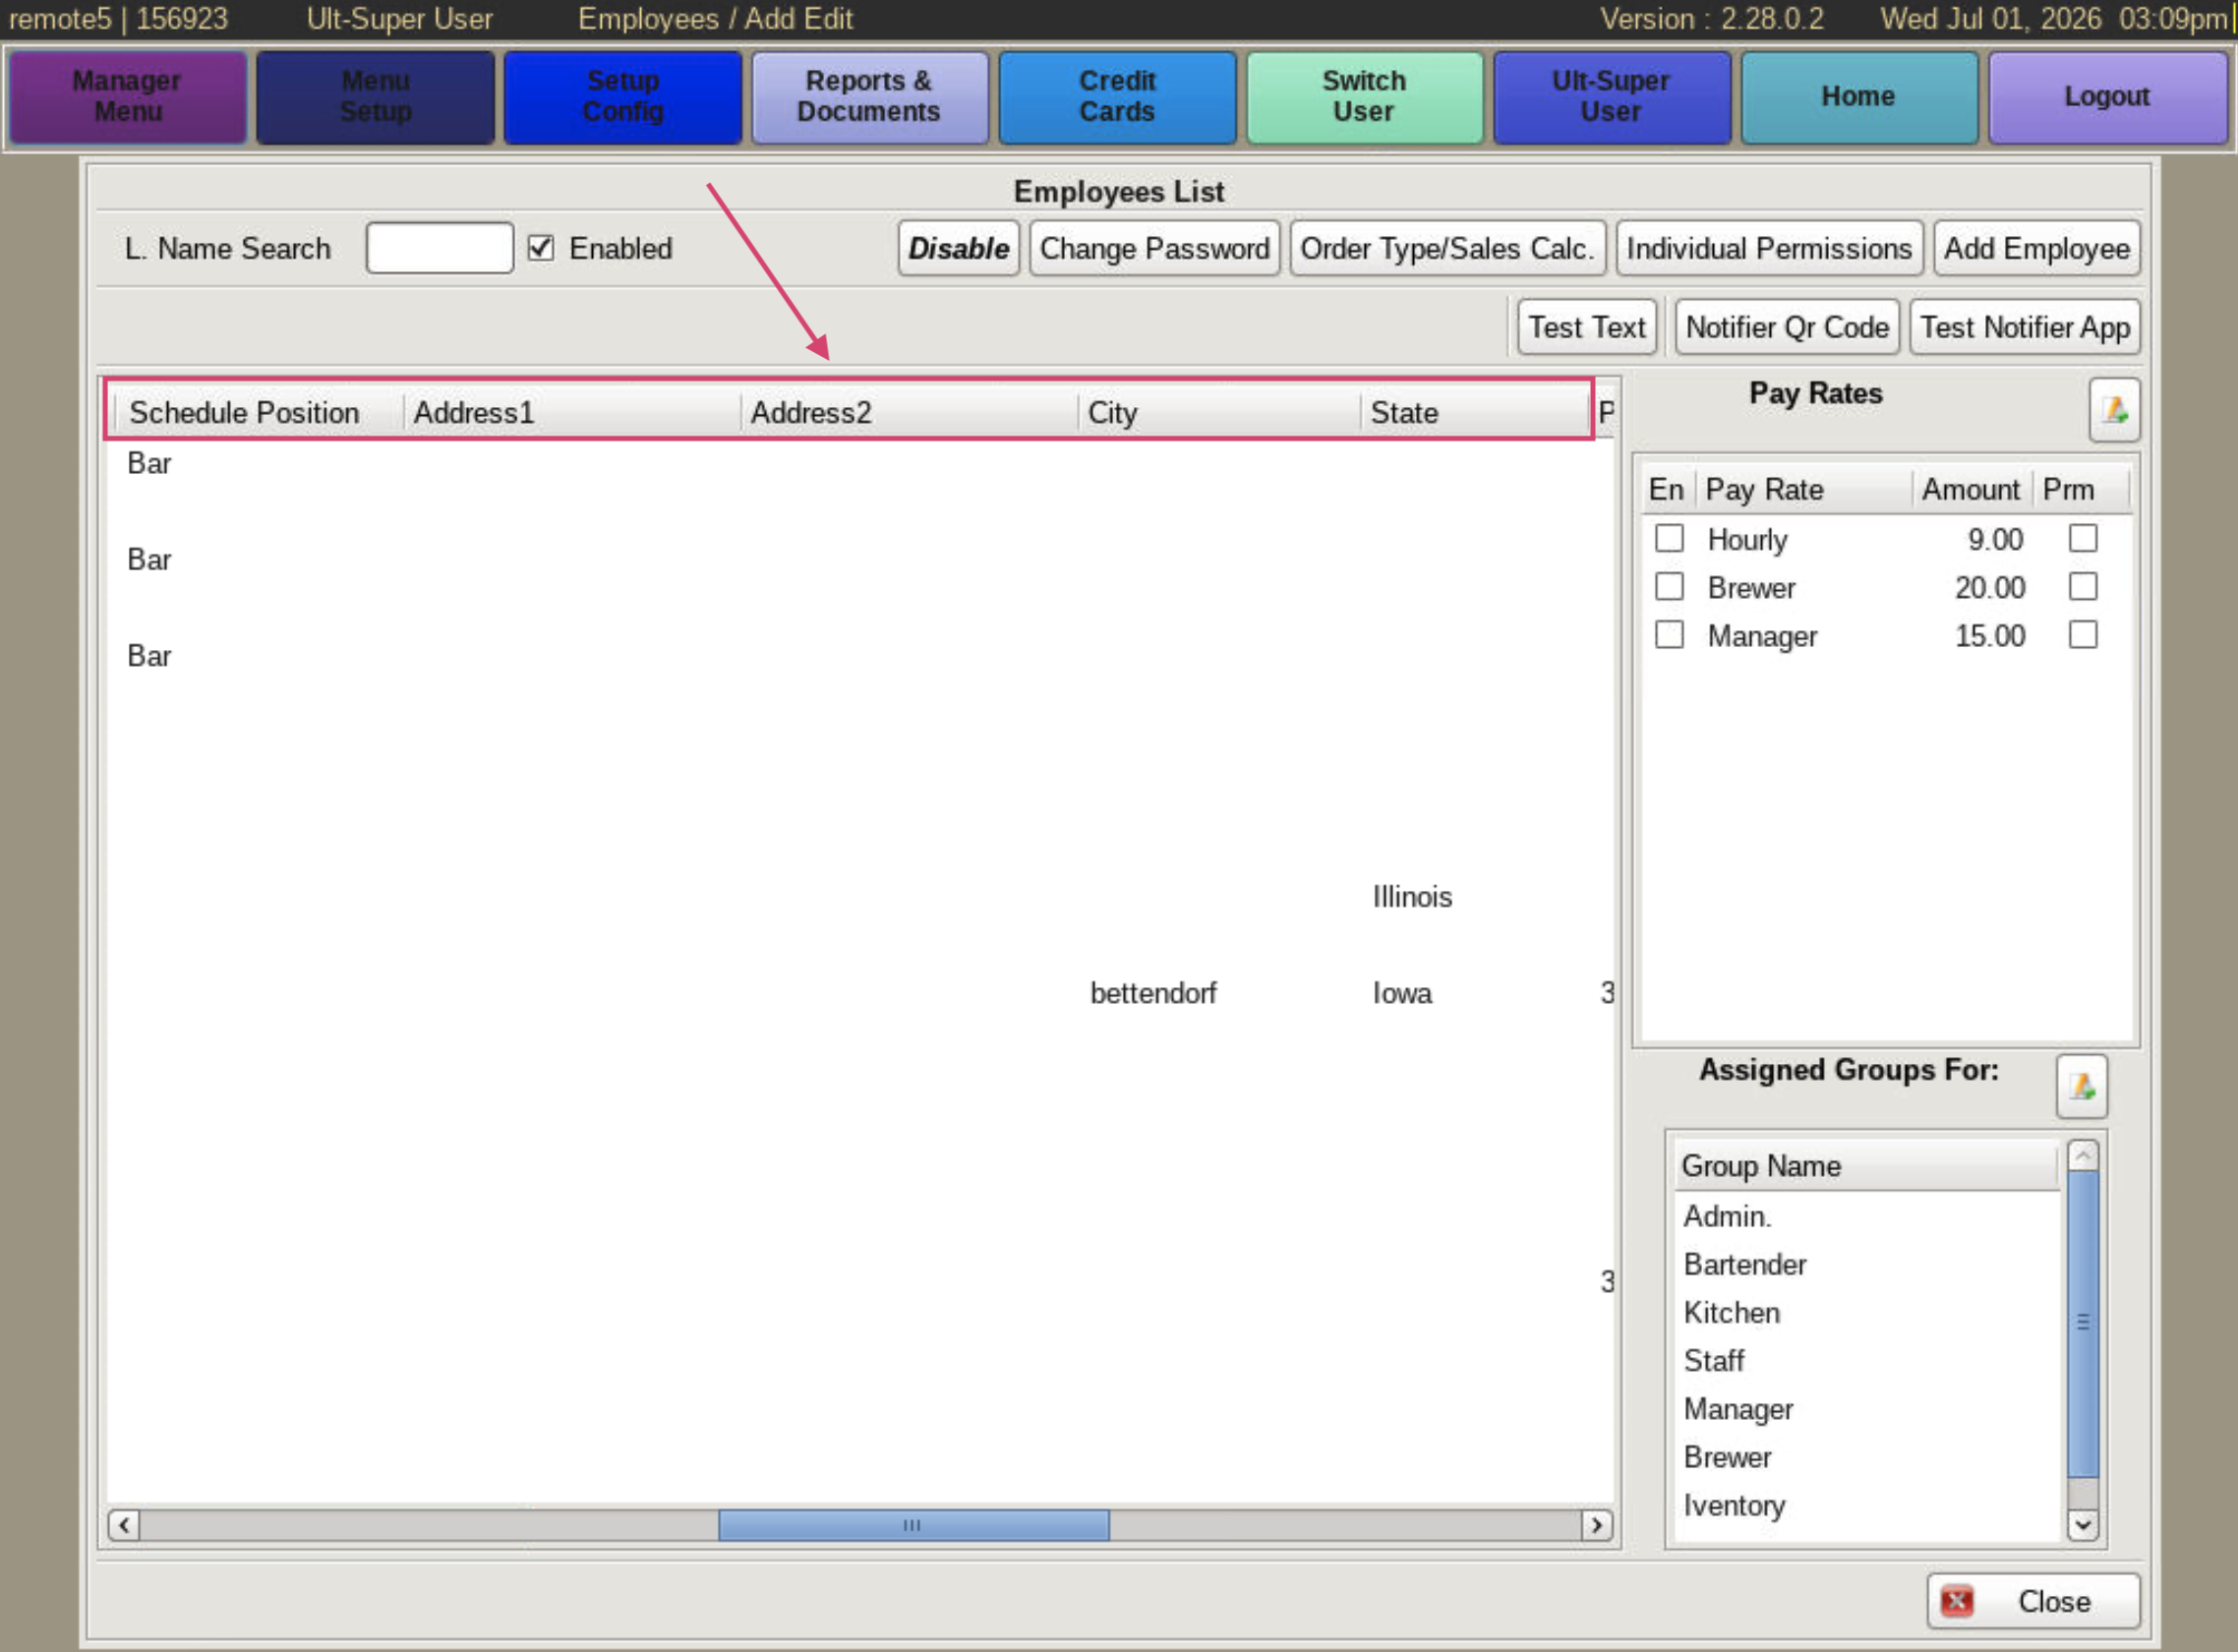
Sched Position: If you're using the work schedule in the POS, this will allow the position to show up on the work schedule.
Address, City, State: You can edit their home address here by clicking in the Address field. This will turn the field into a text box for you to update the information.
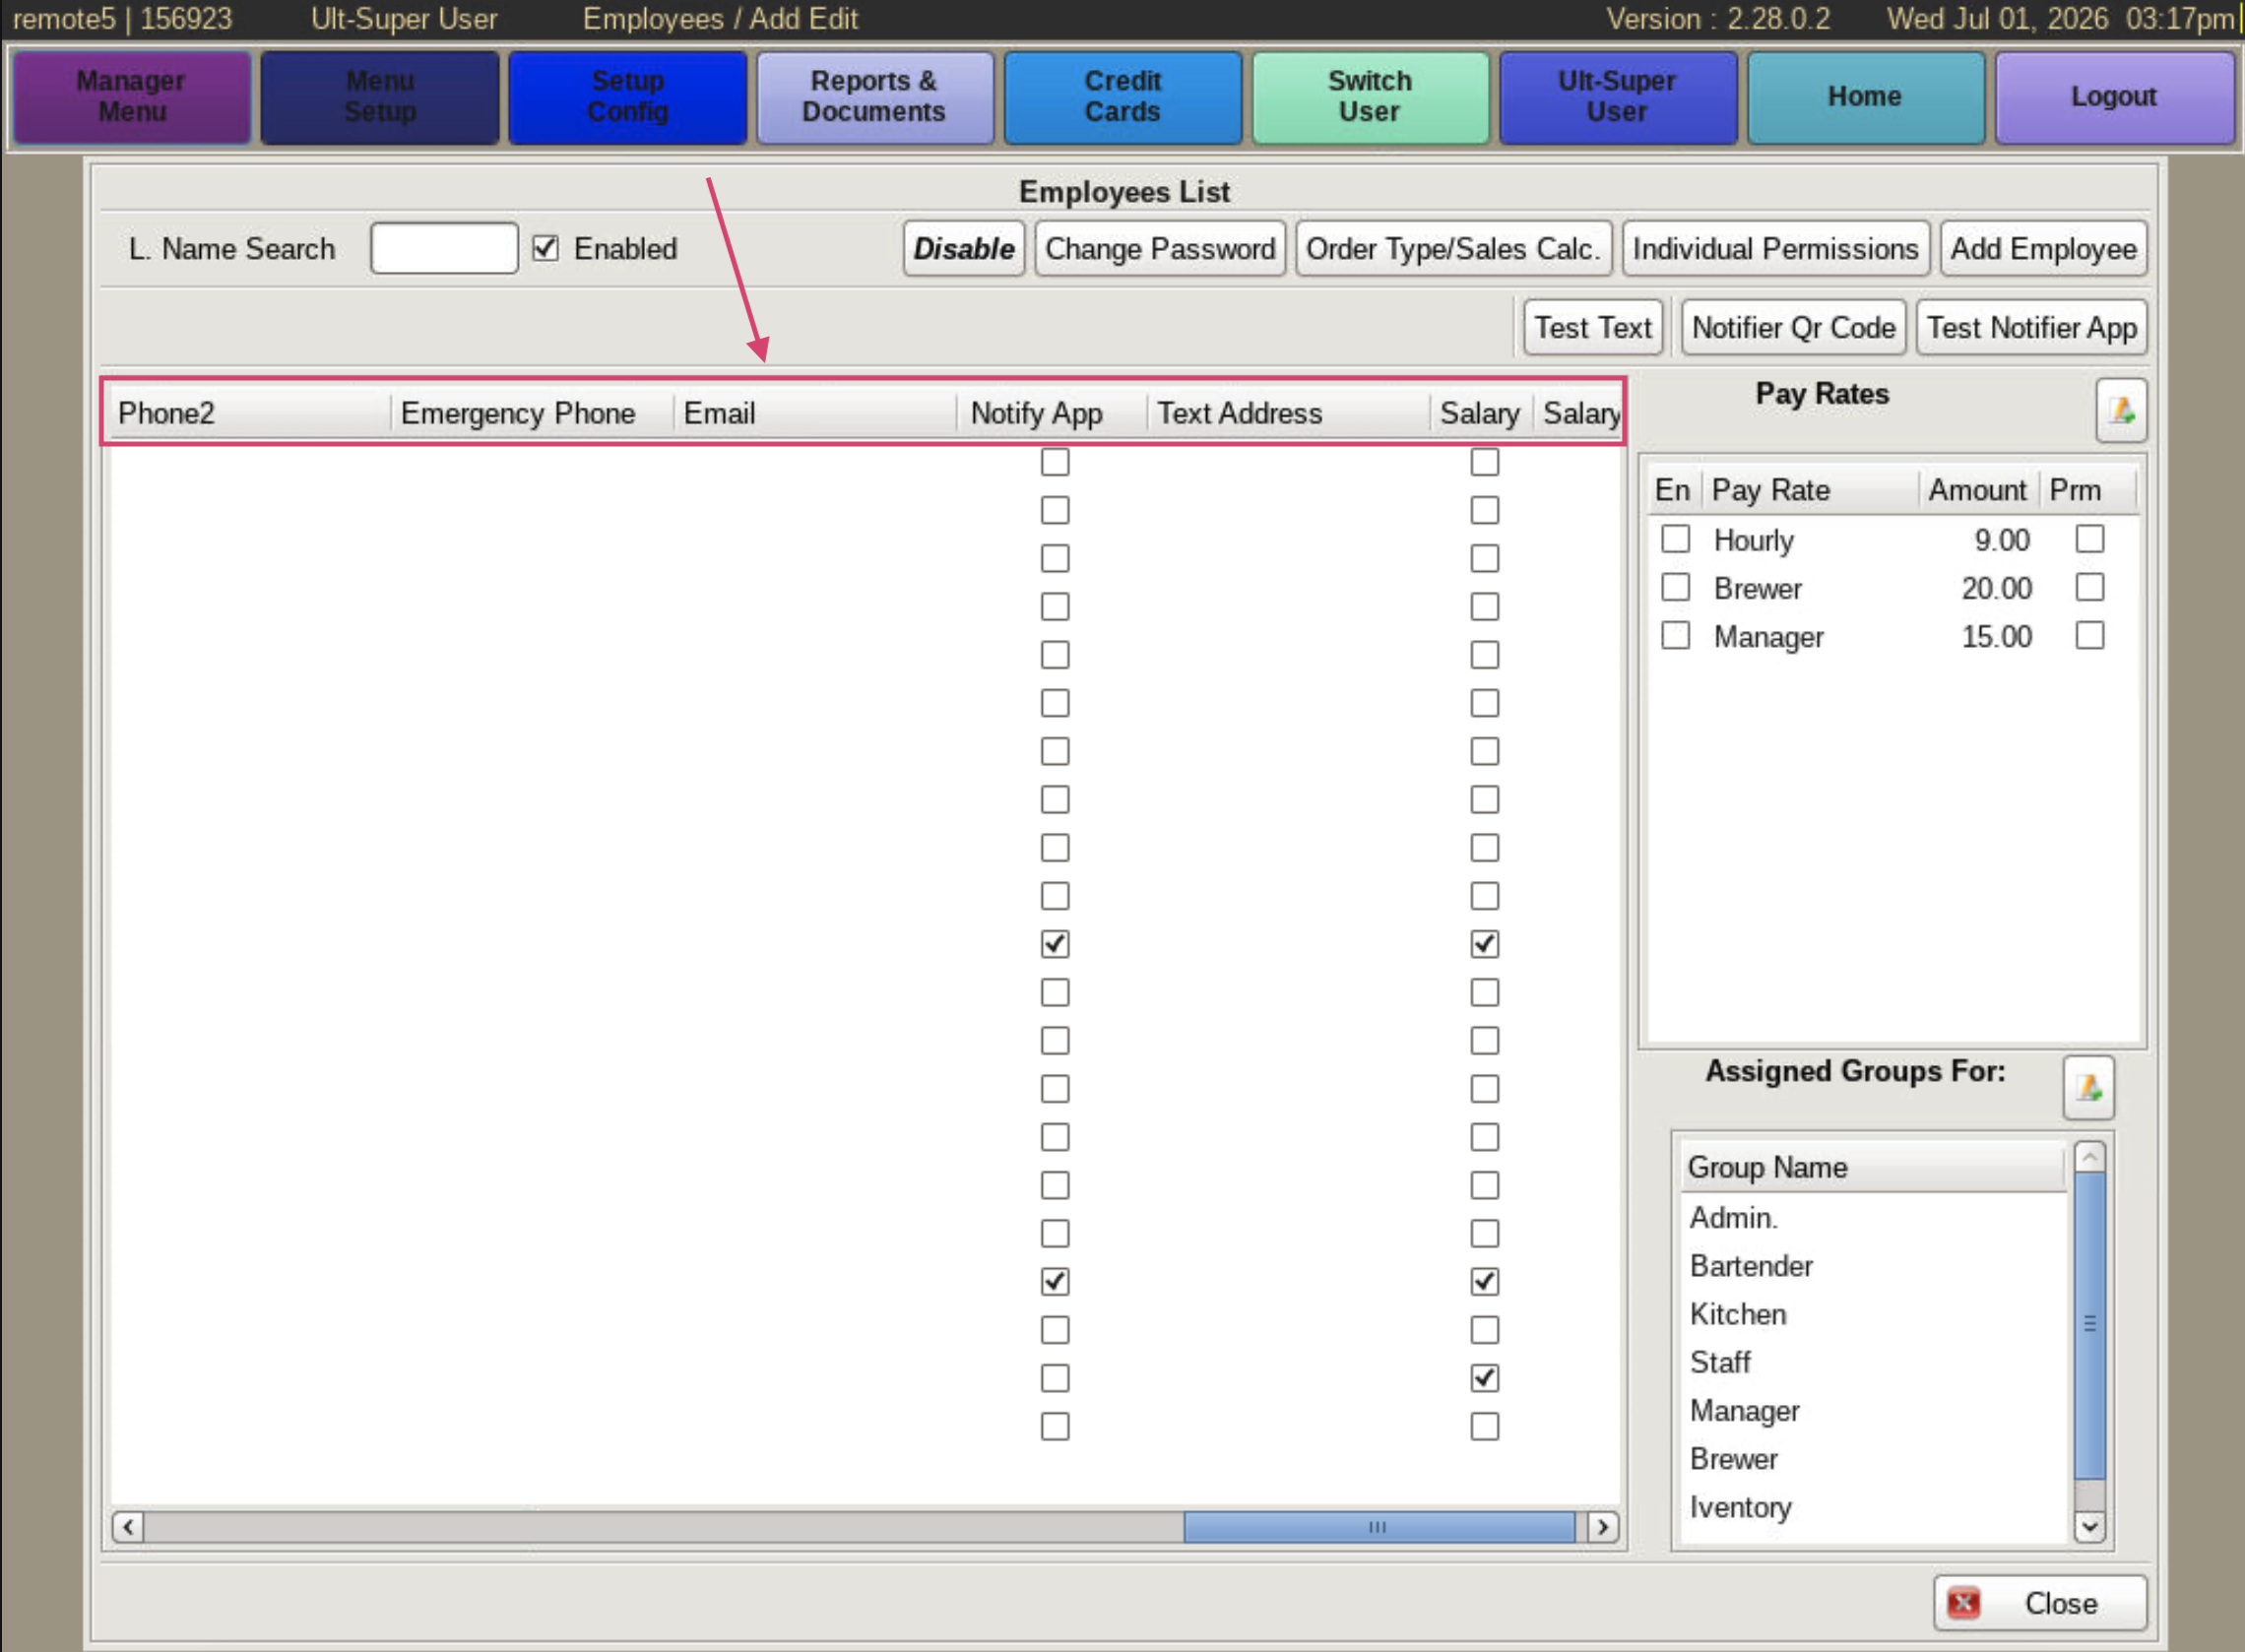
Phone1; Phone2: Edit their phone numbers.
Emergency Phone: Edit the emergency contact information.
Email: Edit the employees email.
Text Address: Edit the employee's text notifier address.
Salary: Check this box if the employee is paid a salary instead of hourly.
Salary $: Enter the salary amount.

On the right, you can check the boxes for the appropriate Pay Rates, highlighted in red, that you assign the employee so that they can clock in to their assigned position and be paid appropriately for that position. The Pay Rate field is editable for each individual employee and their pay rate.
For example, if you have a bartender who sometimes waits tables, you would check the En check box to the left for both the Bartender and the Wait Staff, and enter the appropriate pay rates in each field.
There is also a button to add a Pay Rate position, that is circled in blue, above the Pay Rate box.
Under the Assigned Groups you would check which group/role they fall under. In the bartender example, you would select both Staff and Bartender. An employee can have multiple assigned groups. The permissions are cumulative.