Building and Assigning Food Price Tiers
Price Tiers are used when you want a Food Item, Mixed Drink, or Mixed Drink Ingredient to have different prices on different days or times, such as a daily special. They can be activated by day and time, or can be manually turned on or off.
One example of a Food Item Price Tier, would be if your Burger Basket normally costs $6.99, but on Tuesdays during lunch hours, it only costs $6.00. A Price Tier can be created so that anytime that burger is ordered on Tuesday between 10am and 2pm, it will ring up at $6.00. But, when ordered any other time on Tuesday, or any other day of the week, it rings up at the regular $6.99.
Here we will walk through creating, and adding Price Tiers to a Food Item.

Adding A New Price Tier
To create a new Price Tier, select Menu Setup from the top bar of the home screen.
Then select Price Tiers, and choose Price Tier Names.
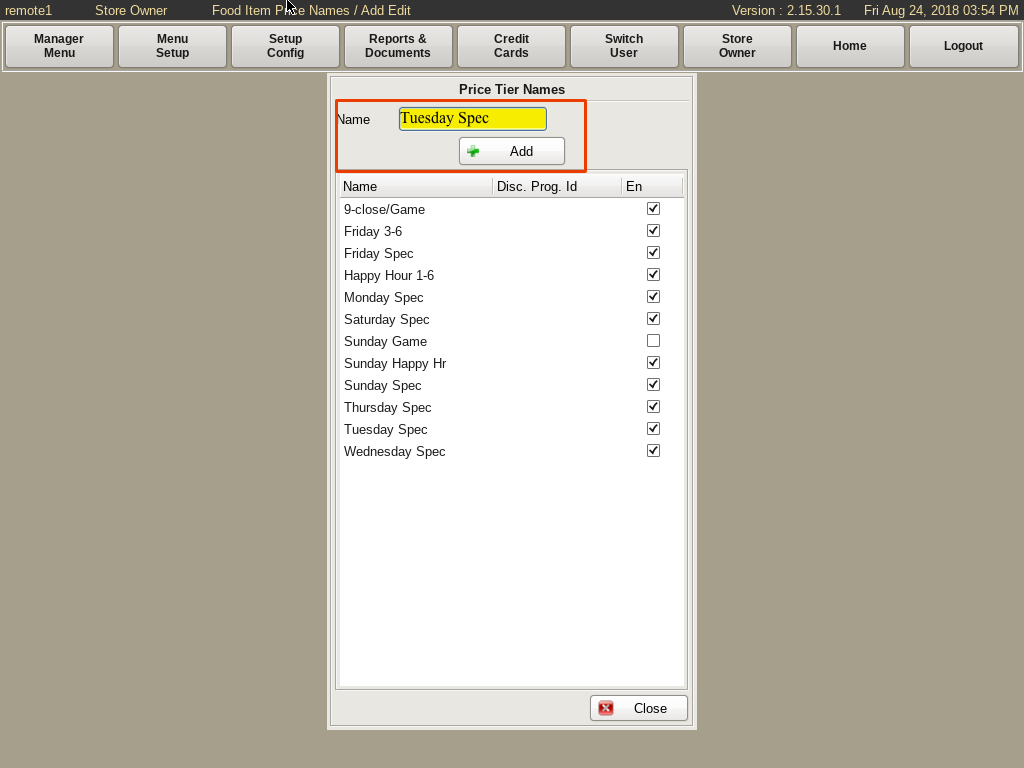
Type in the Name of the new tier(s) in the yellow field; i.e. Tuesday Special.
Click the +Add button.
You can also enable and disable tiers from this page by clicking the En checkbox.
Assigning Price Tier to Food Item
Now that you have the Price Tiers created, you need to assign it to a food item.
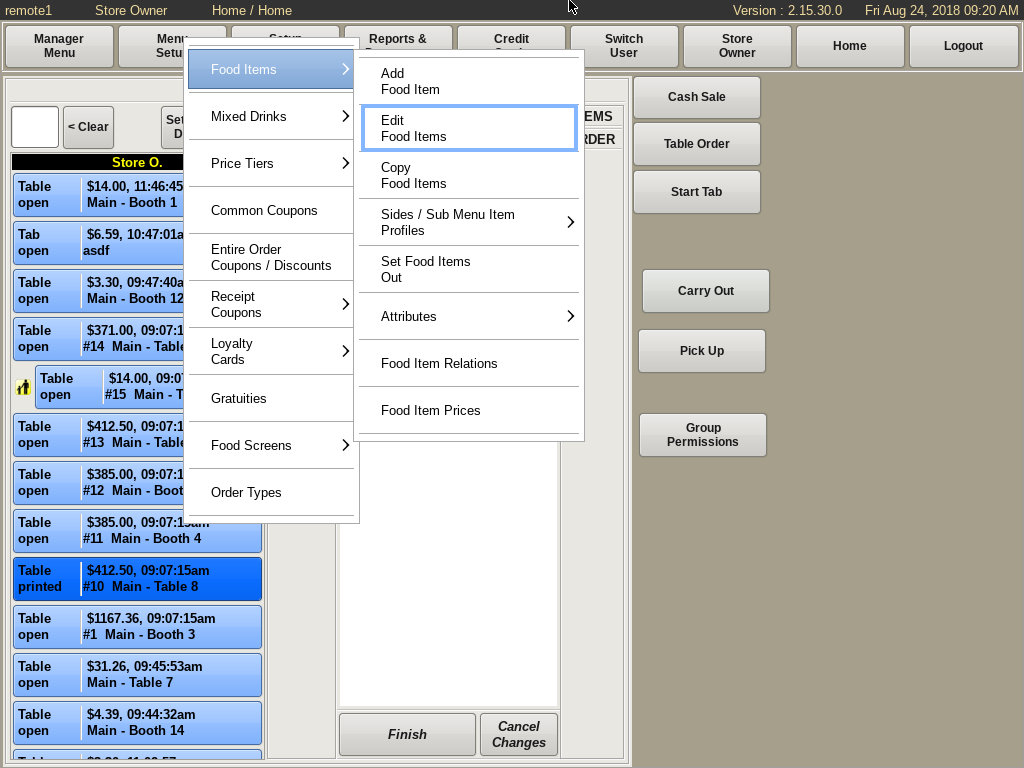
To do this, select Menu Setup from the top bar of the home screen. Then go to Food Items and choose Edit Food Items.
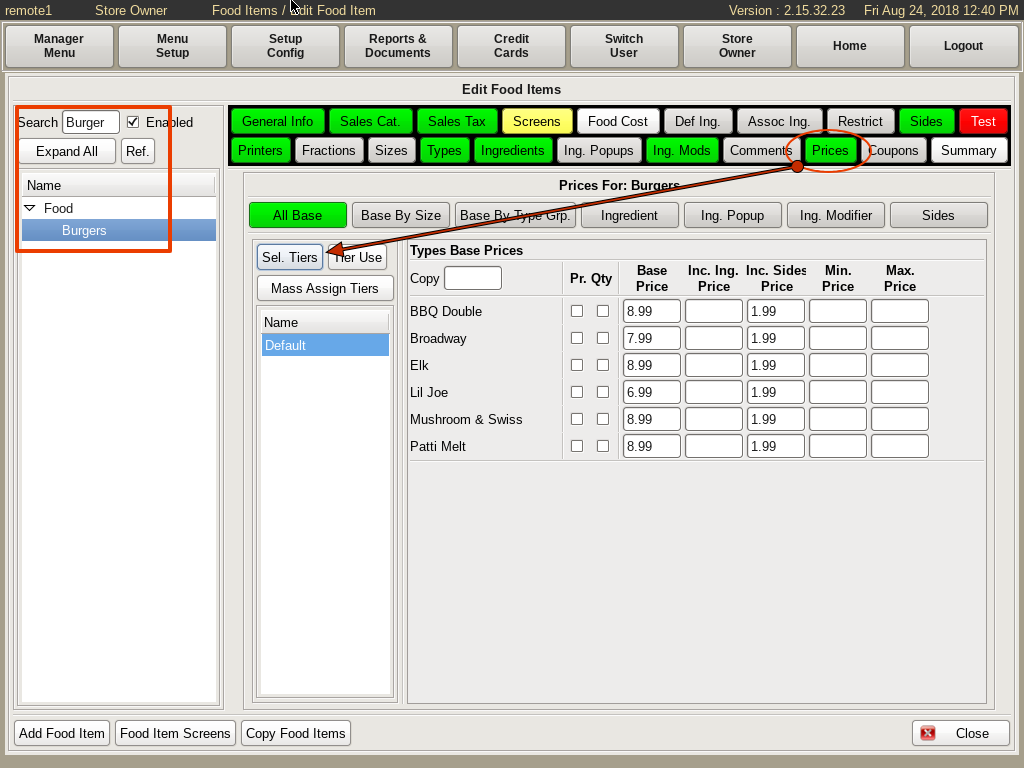
Search for and select the food item on the left. Then click the Prices tab. You will see the default pricing for your food items.
Click on the Sel. Tiers button.
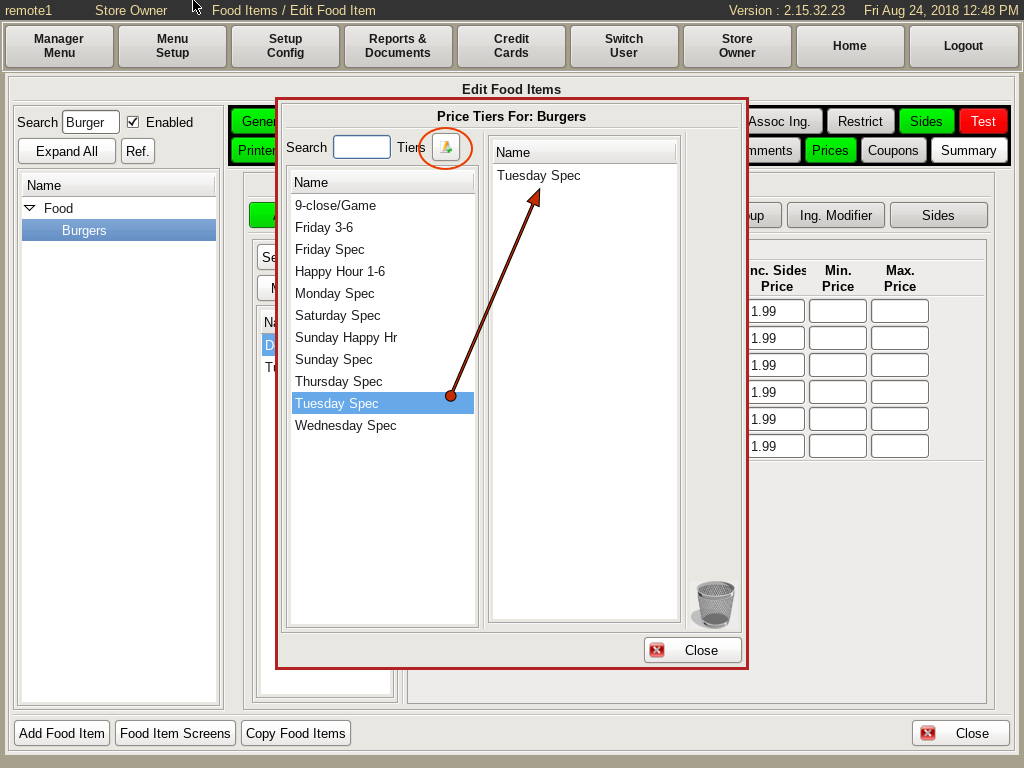
A window will pop up that shows all the Price Tiers that have been created. Click on the one(s) you want associated with this particular food item.
If you need to delete one, drag it to the trash can. If you need to add a tier, click the + Add button to name a new tier.
Click Close.
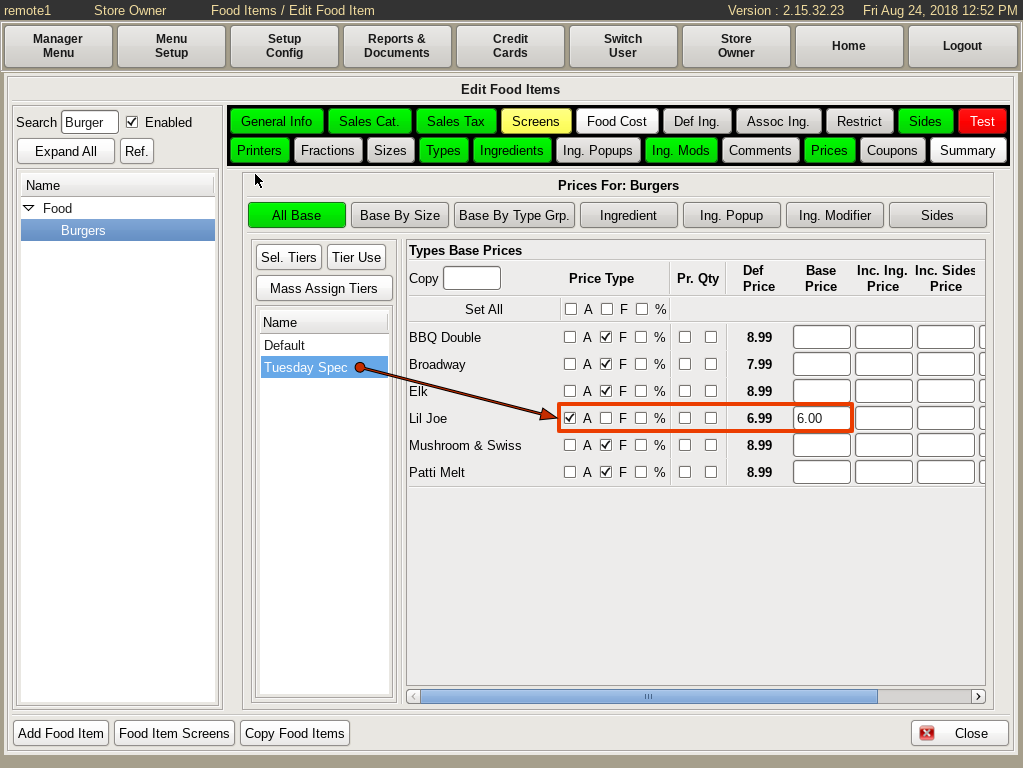
You will now see the Price Tiers listed below Default. Click on the Price Tier you want to assign to that specific food item.
You will see a modified version of the Prices tab.
Notice the checkboxes A, F, and %.
A: Actual. You're ACTUALLY charging a specific dollar amount.
Example: If you want to charge $6 for a sandwich, no matter what it originally cost, set to A, and put 6.00 in the base price field.
If your regular prices change, these will still charge $6 during the tier times.
F: Fixed Adjustment. Giving a specific dollar amount off an item.
Example: If you want to give $1 off for sandwiches, set to F, and put -1.00 in the base price fields. Now each sandwich is $1 off.
If your regular prices change, the special prices will change with them, and will stay $1 off.
%: Percent. Giving a percentage off an item.
Example: If you want half off sandwiches, set to % and put .50 in the base price field.
If your regular prices change, the special prices will change, but will stay half off.
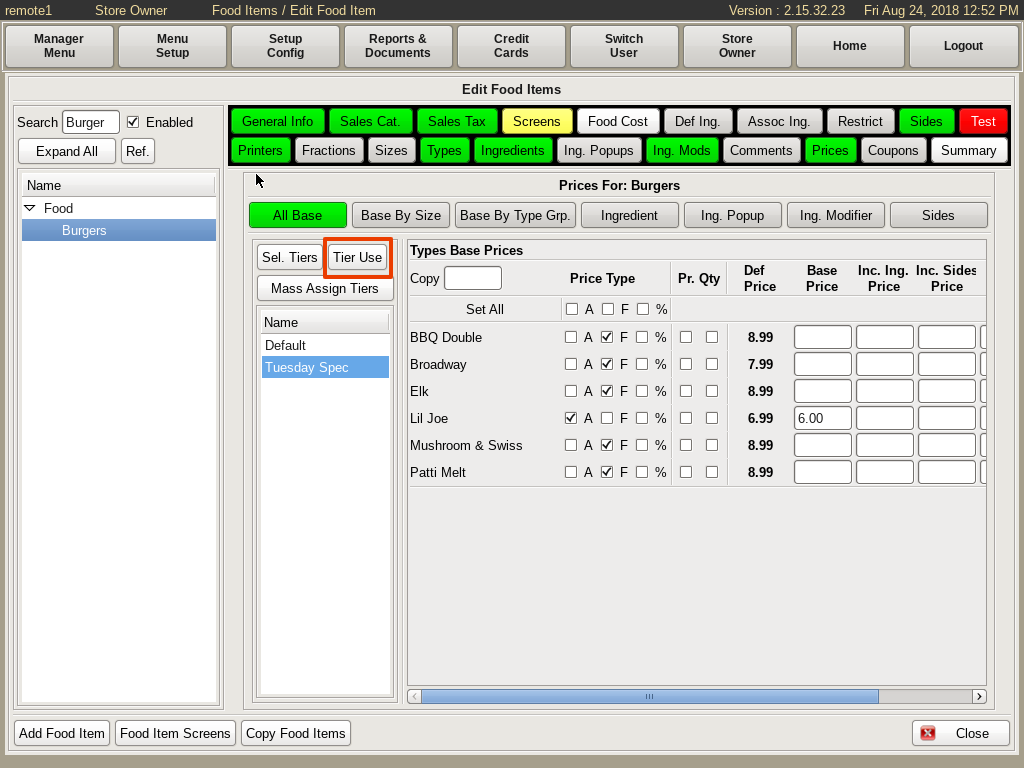
Setting Tier Operation Time
After assigning a Price Tier to a food item, you need to define the days and times the tier will be operational.
To do this, click the Tier Use button.
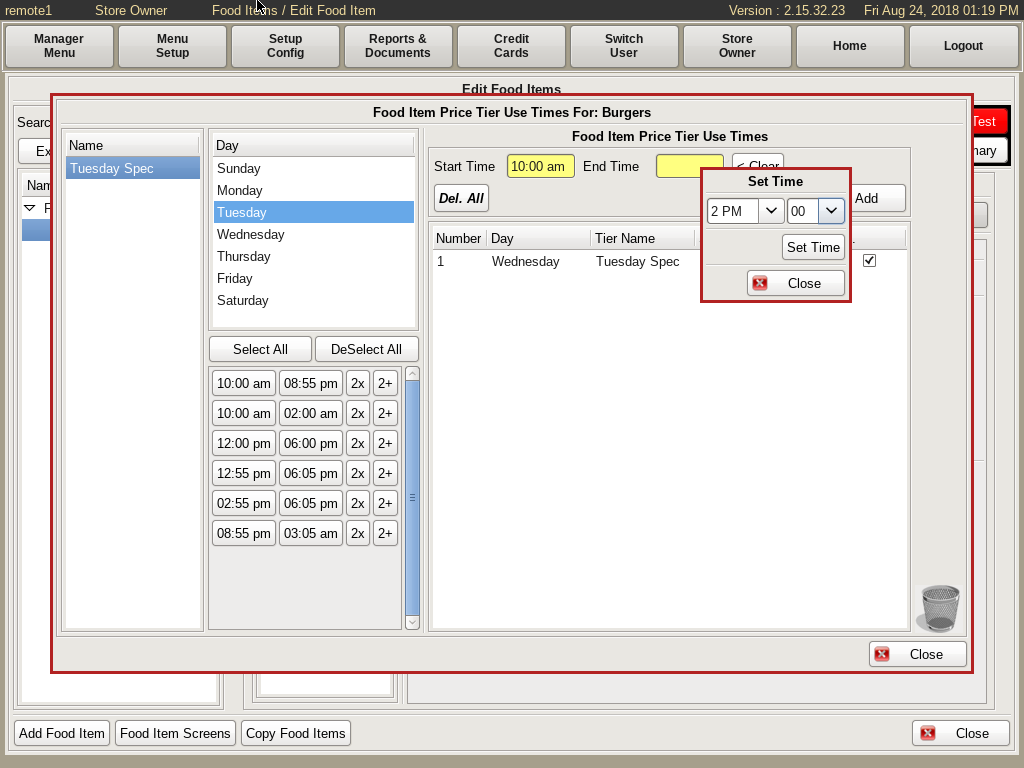
In the left column, choose the tier you need to work with, if it's not already selected.
In the middle column, choose the day(s) of the week you want the tier to run.
In the right column, select the Start Time and End Time.
Click +Add, and it will appear in the operation list below.
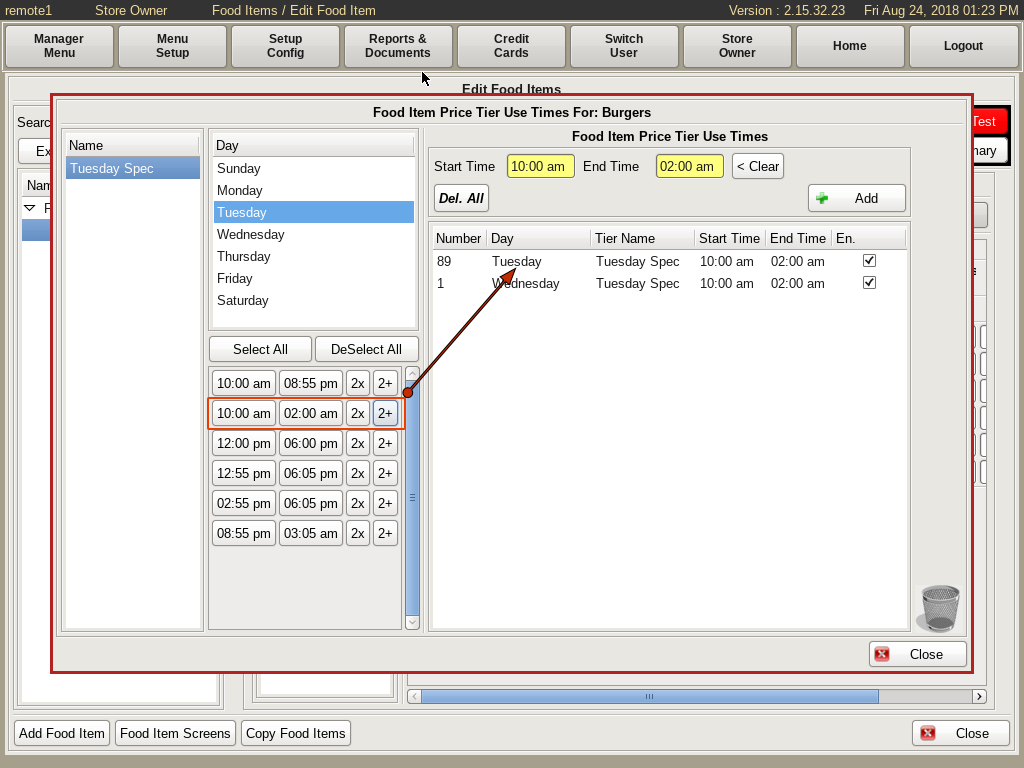
In the middle column, under the days, if you already have start/end times set for other tiers, they will show up here. There will be two buttons; 2x and 2+.
2x will automatically move the start/end times to the yellow field boxes on the right. Click +Add to add it to the operation list.
2+ will not only move it to the start/end times boxes, but will also automatically add it to the operation list. Simply click Close when done.
You will now have a functioning Price Tier on the specified day and time.
You can also assign a Price Tier to multiple food items at one time. To do this, follow the instructions on how to Mass Assign Price Tiers.
You can also assign Price Tier to Mixed Drinks and Mixed Drink Ingredients. To do this, follow the instructions HERE.