Add and Edit Cash Drawers
Here we have the Add/Edit Cash Drawers screen. It can be accessed by clicking on Manager Menu from the top bar of the home screen. Then go to Cash Drawers and choose Edit Cash Drawers.
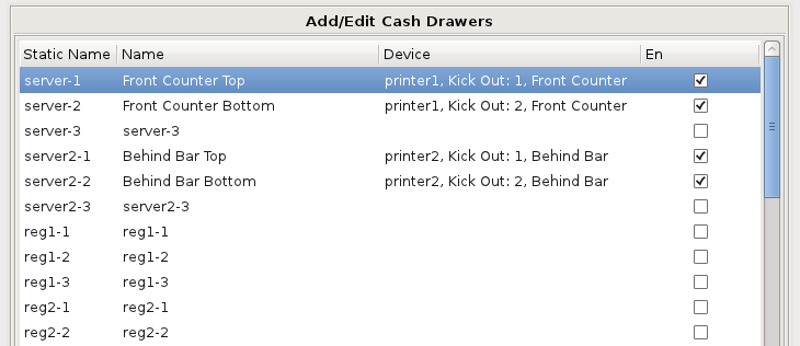
The Static Name represents a specific computer, or terminal's name, which is found in the upper left corner of the screen. Your terminals are named Server, Server2, Reg1, Reg2, Reg3, etc.
Each terminal may have up to two cash drawers if using the receipt printer with kick-out splitter. For example, if you have two cash drawers on the computer named Server. The static name for those drawers will be Server-1 for the first drawer, and Server-2 for the second drawer.
The next step is to go to the
Under the Device column, you will need to tell the computer how to open the cash drawers you will be using.
If you have a receipt printer with kick out splitter, you will need to select the proper kick out port that corresponds to the drawer it is hooked to. The splitter is labeled on the bottom to help simplify setup.
The last column determines if the drawer shows up in the list of available drawers to be assigned. Check the box to enable the drawer, clear the box to disable it.