Checkout My Current Server/Delivery Cash Out
When checking out your Cash Out, the goal is to make sure that everything is recorded properly and fairly so that everyone gets what they earned. The store gets the correct money for sales and the server or delivery driver gets their correct tips.
Making sure that your cash out balances correctly will also make reports and accounting easier at the end of the day and the end of the month.
Before checking out your cash out:
Make sure you have no open or unpaid tables
Tip adjust your credit card transactions
Make sure another server or employee can help any customers that might need to pay their bill
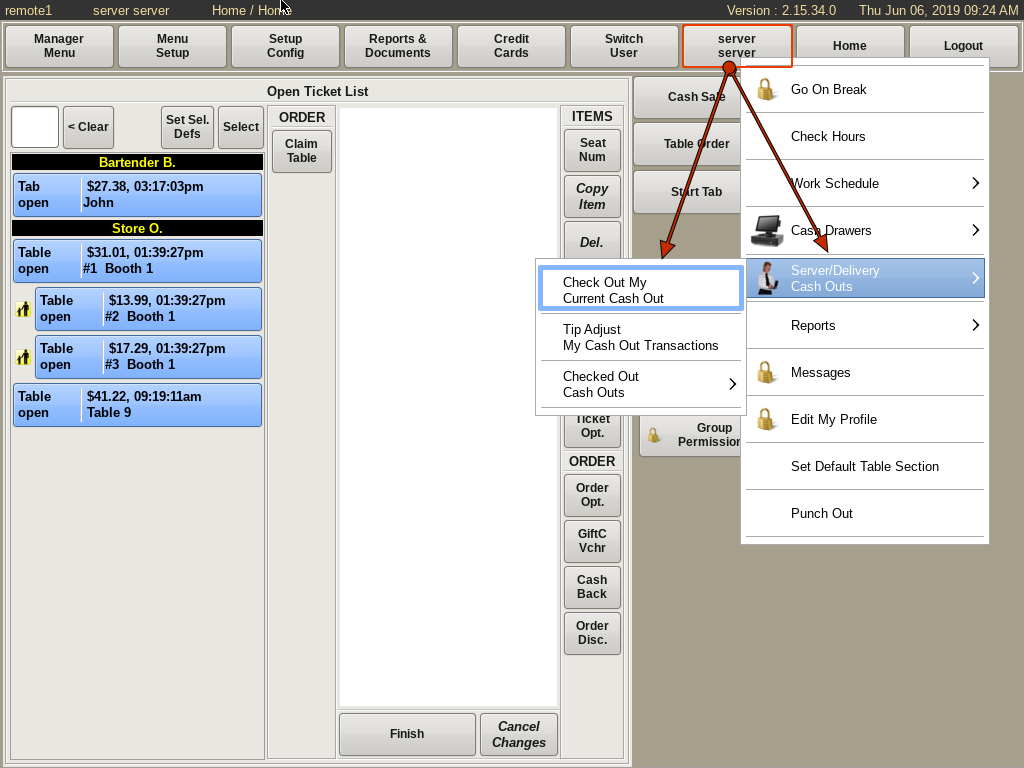
To Cash Out, select your User Name from the top. Go to Cash Outs, then choose Check Out Your Current Cash Out.
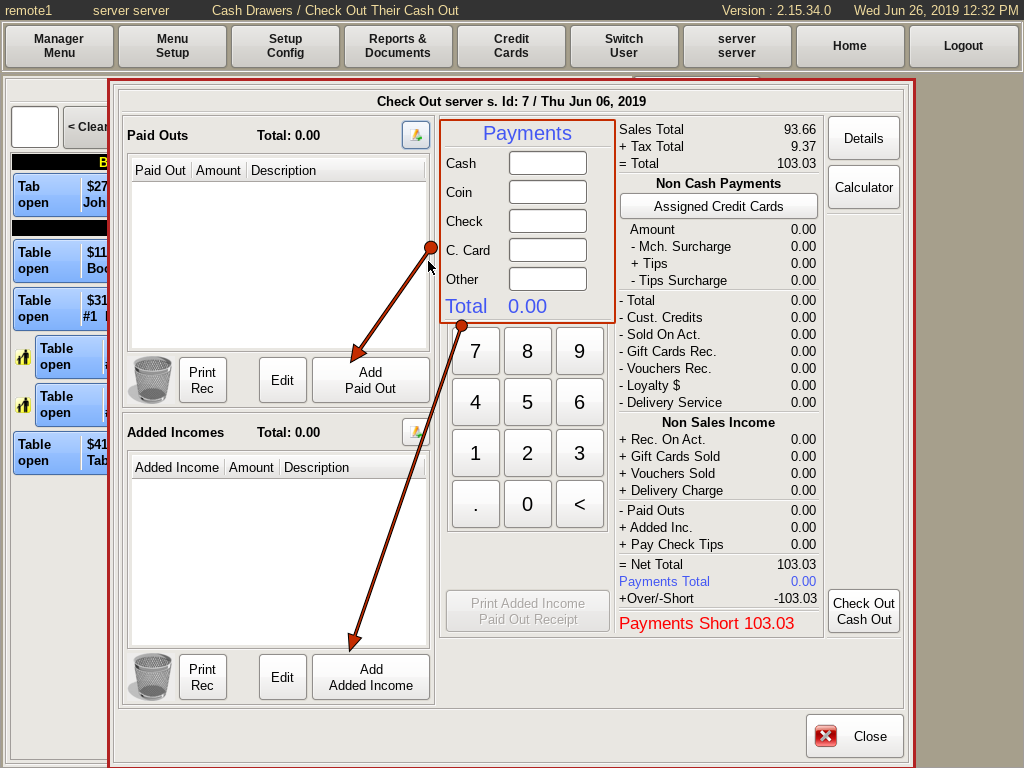
To find out how much you owe, or is owed to you, you will use the POS to calculate the Over/Short balance. The totals on the right will update as you input information into the form, helping to guide you along the way.
Begin by leaving the Cash and Coin fields blank.
Enter any Added Incomes or Paid Outs as described below.
Enter the total of any check payments in the Check field.
Enter the total of any credit cards NOT run through the POS in the C Card field, if any. The POS takes into account any credit cards run through the system and any entered Paid Outs and Added Incomes
Enter any non-POS generated vouchers, if any, in the Other field.
Once all the amounts are entered, the POS will calculate how much money is owed.
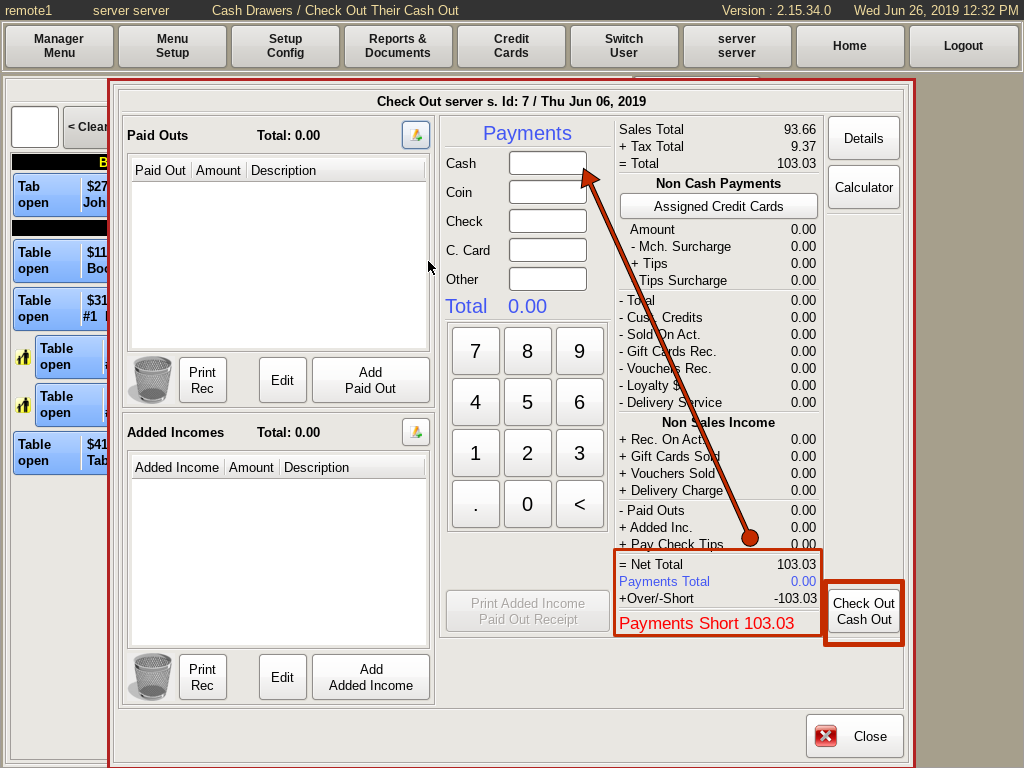
This total can be found in the +Over/-Short line at the bottom of the right column.
Enter the -Short amount (if it is short) in the Cash/Coin field, unless you there is a positive balance. In that case, see Positive Cashout, as described below. If not, count out and set that money aside for your cash out deposit.
Also, count out and set aside cash to replenish your bank bag to it's starting total for the next shift. (You will skip this if you are required to furnish your own bank.) Any amount left in the bank bag after these adjustments is tips. Count and keep track of your tips as well, since you MAY be asked to enter that amount when you punch out.
Once you have everything in order, click the Check Out Cash Out button and put the print out with your deposit money.
Positive Cash Outs
When you have more credit card tips than you have cash sales, this is considered a Positive Cash Out. Your payment total will already be over before entering any cash/coin payment totals. When this happens, you need to add an Added Income to your cash out for the over amount.
You will add this added income as a Tip Out with the name of the person you received the cash from as the description. Normally you will get this money from the bartender or a cashier with a Cash Drawer or Server Cash Out. They will need to add a matching PAID OUT on their cash drawer cash out.
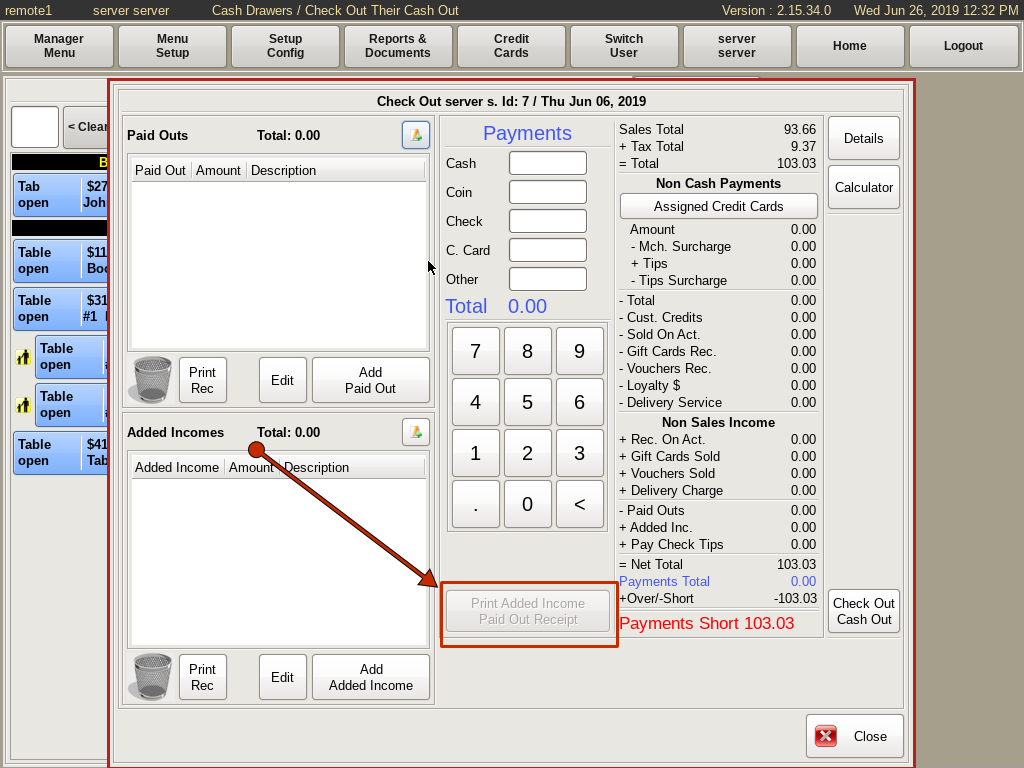
Use the Print Added Income Paid Out Receipt button provided to print two receipts; one Paid Out and one Added Income. The Paid Out receipt is for the person's cash out that the money came from. The Added Income receipt is for your cash out. Handling Positive Cash Outs this way will create a distinct paper trail on each Cash Out.
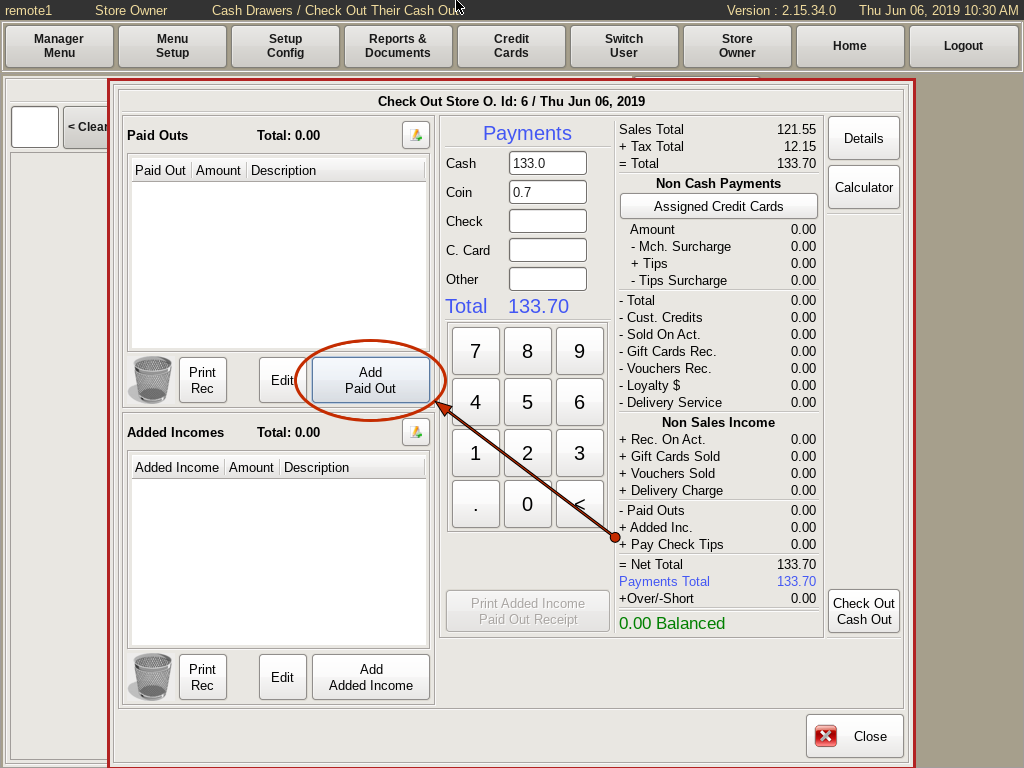
Paid Outs
Paid Outs are any items that were paid out of a cash drawer. For example, paying a server their cash tips for the night out of your drawer. To enter a Paid Out, click the Add Paid Out button.
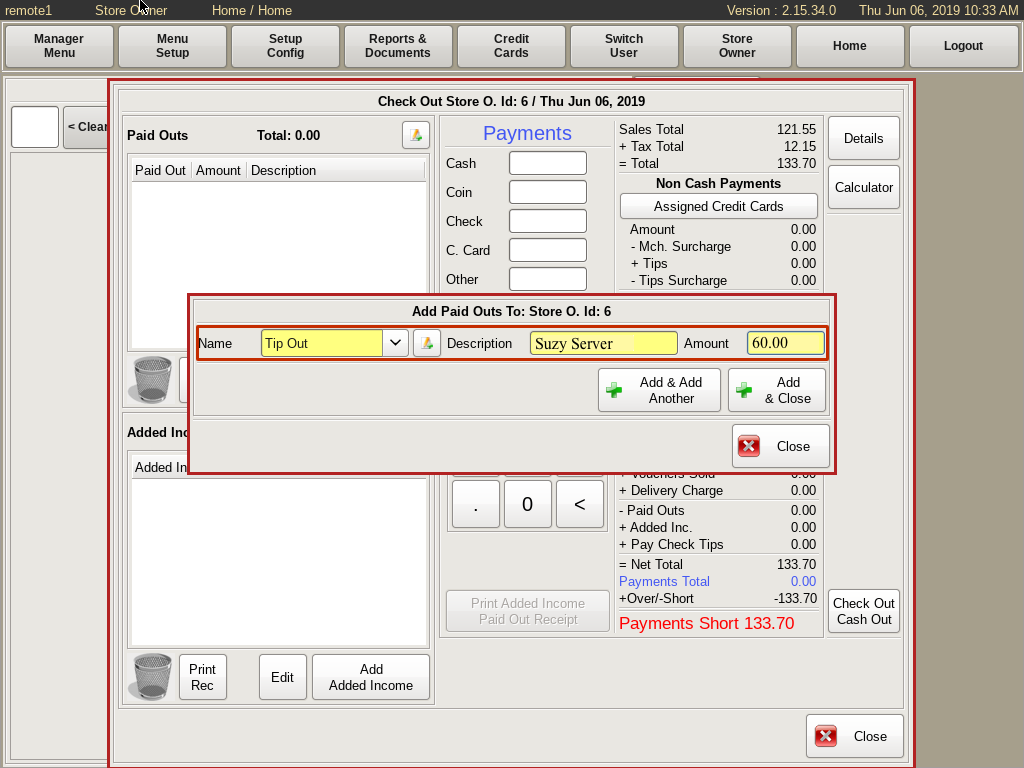
Use the drop down to choose a category for the paid out. Then enter a description of the purchase, and the amount of money paid for the purchase.
Click the Add & Close button to enter the paid out into the POS. If you need to add more than one, click the Add & Add Another button to enter the rest.
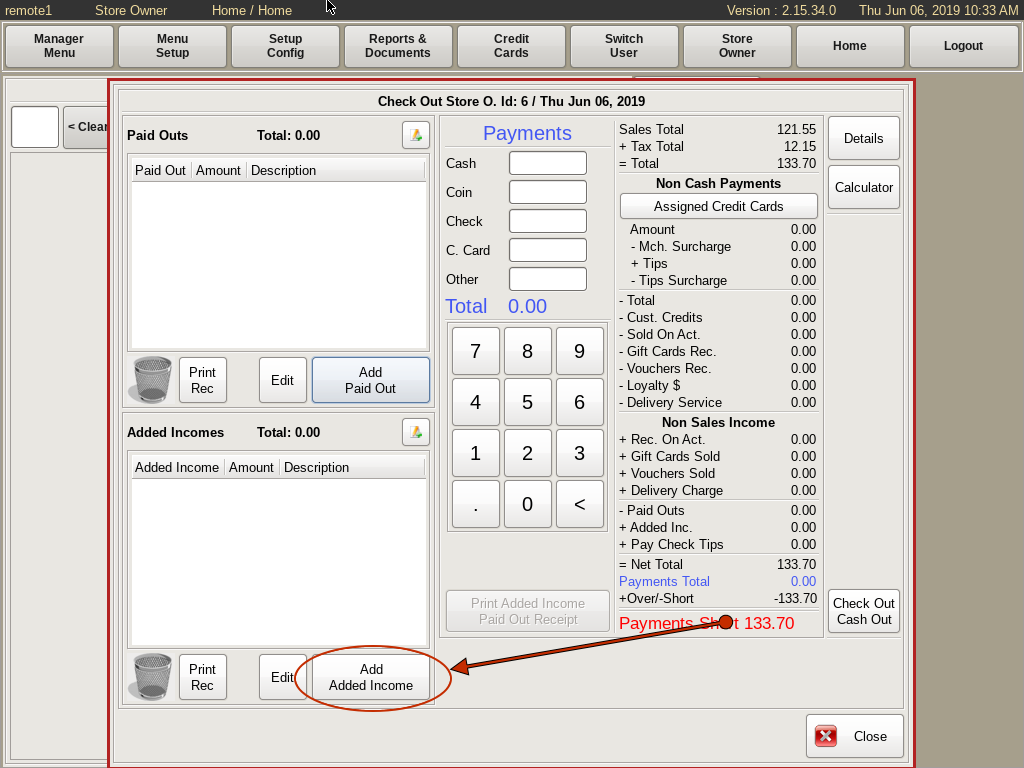
Added Income
Added Income is any items that were paid into a cash drawer that were NOT for a cash sale. To enter an Added Income, click the Add Added Income button.
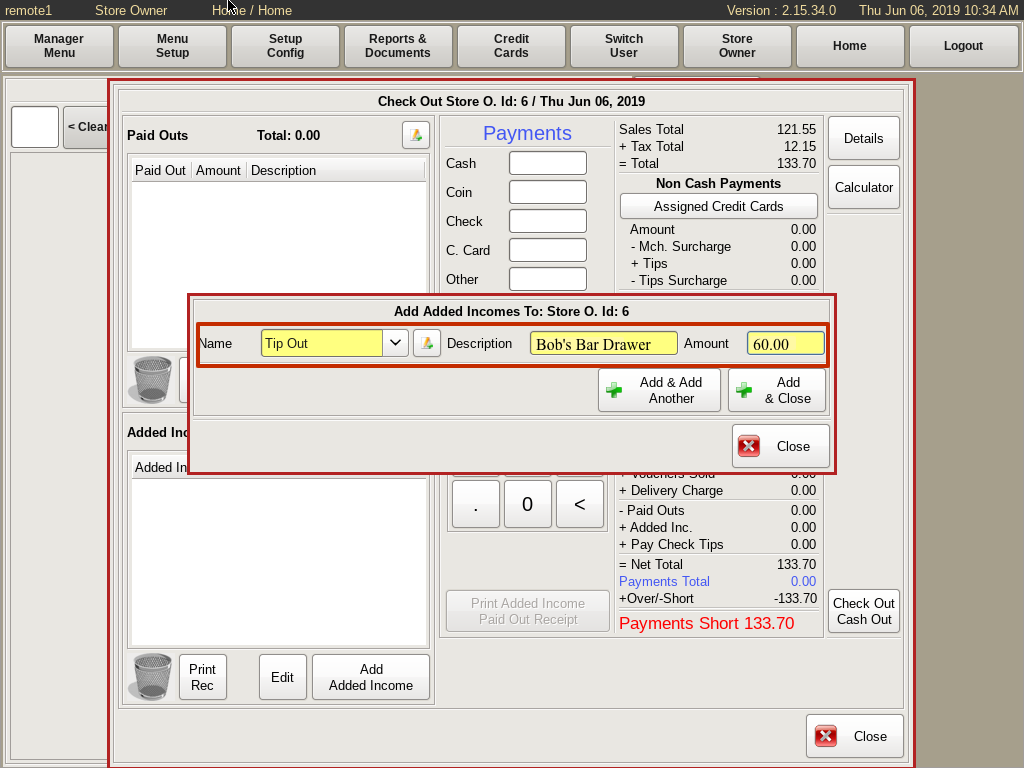
Use the drop down to choose a category for the income. Then enter a description, and the amount of money added.
Click the Add & Close button to enter the Added Income into the POS. To enter more, click the Add & Add Another button to enter the rest.