Create and Modify Graphical Table Setup
Table Sections allow you to add seating areas to the POS. Here we will walk through a Graphical Table Setup.
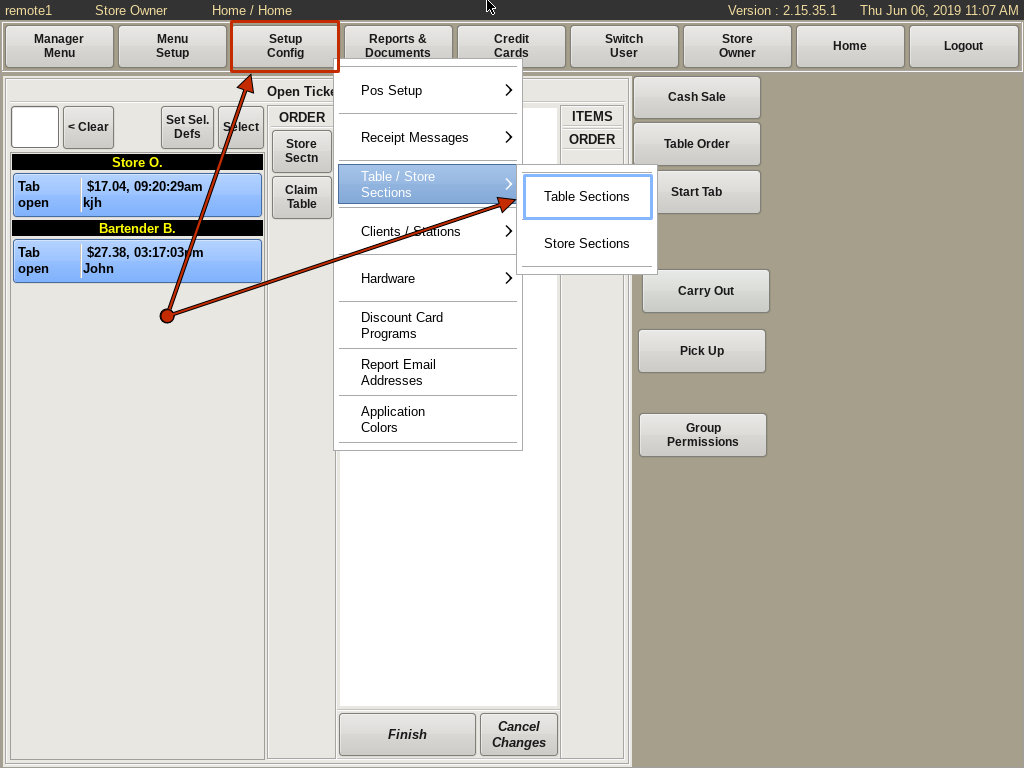
From the home screen, select the Setup Config tab from the top.
Go to Tables/Store Sections and choose Table Sections.
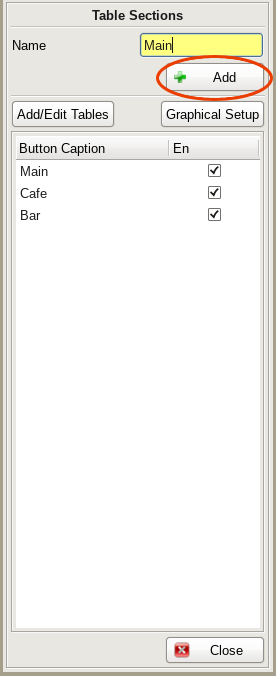
Give the section a name by filling in the yellow Name field; such as Main, Side Room, Bar, etc. Click the +Add button.
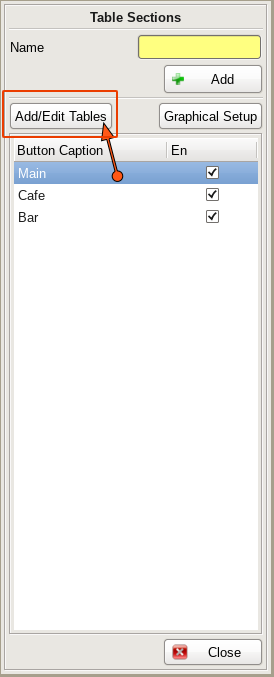
Select the new section you created and click the Add/Edit Tables button.
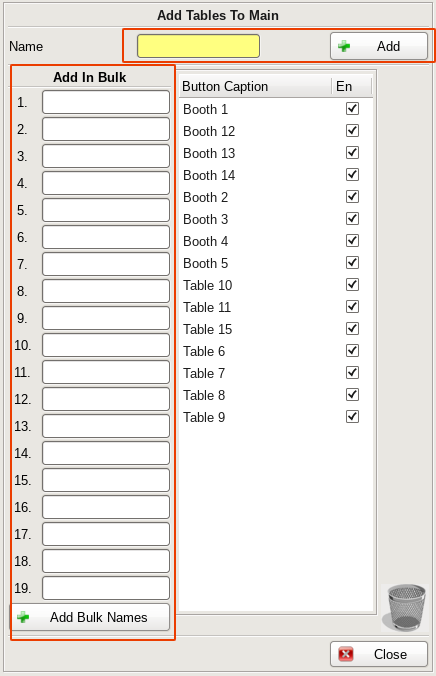
To add the tables in bulk, fill in all the names of the tables you need and select the Add Bulk Names button at the bottom.
To just enter a single table, type in the yellow Name field at the top and click the +Add button. Then Close.
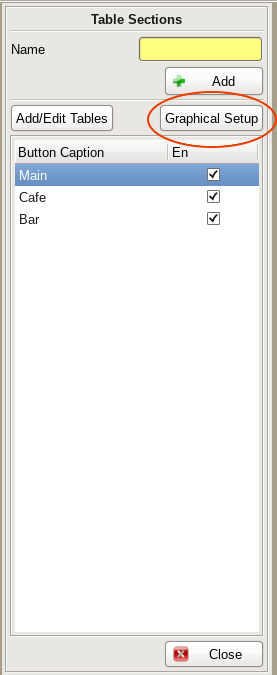
Now, select the Graphical Setup button.
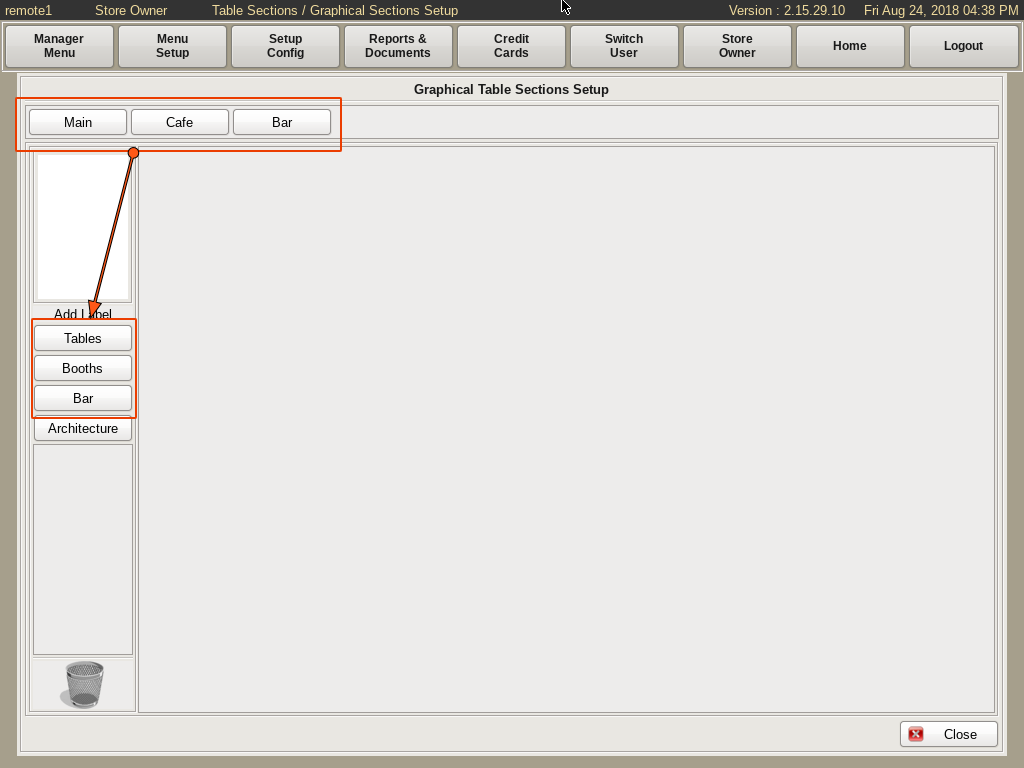
Choose the section you wish to work with. Expand the grey area to make it easier to work with.
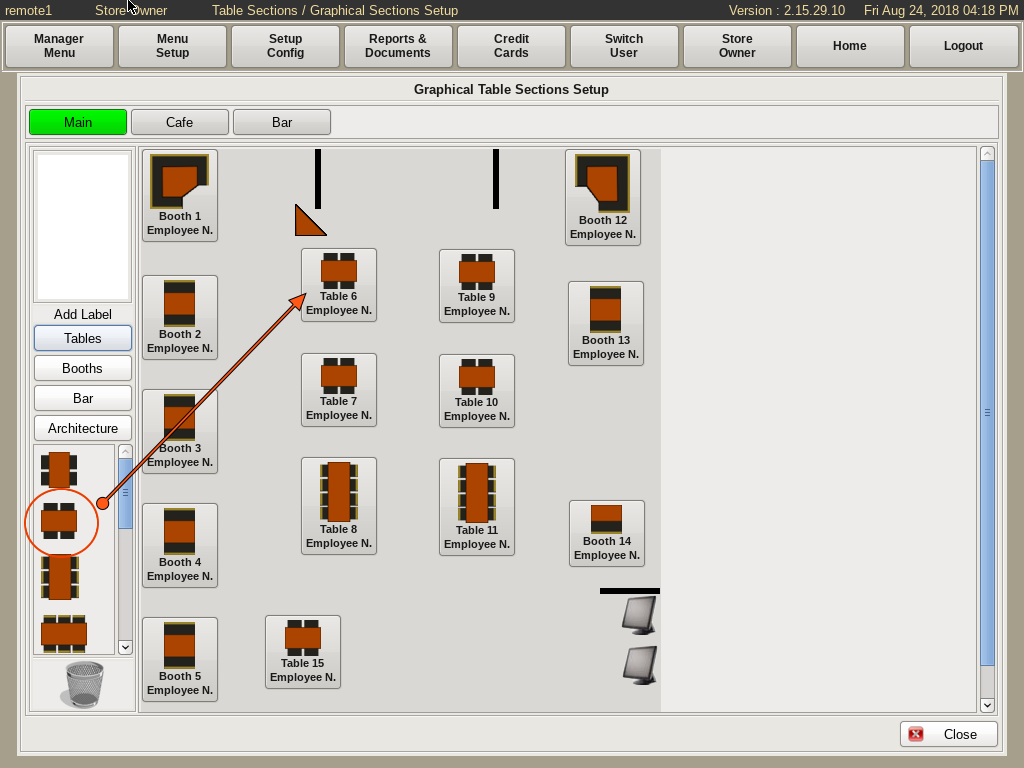
Click on a table name to highlight it.
Using the four Add Label buttons on the left, choose either Table, Booths, or Bar.
Drag and drop the tables where you need them, to be set up like your establishment. You can use the arrow keys for fine adjustments.
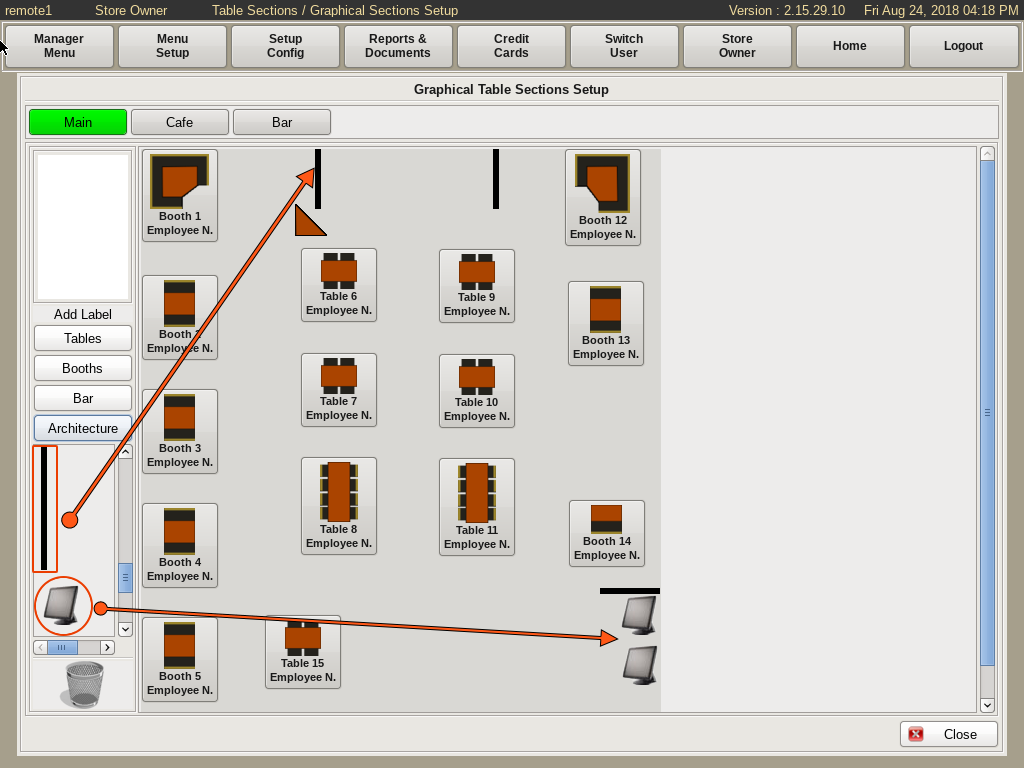
Using the Architecture button, you can add additional architecture that your business has. Such as POS Systems, Counters, etc.
Doing this will give you a better sense of direction of where tables are located in the establishment.